This article covers the installation and basic operations of AI agent tools. The February 20 workshop will include live demonstrations and Q&A. I strongly recommend that participants complete the setup steps below before the session. If you can't attend the live workshop, don't worry — through this post (including the comments section), you'll be able to access the video recording and all learning materials.
Register for the Workshop
Register NowSponsored by the Trae team. Participants receive complimentary Trae tokens (valid for 3 days).
What Are AI Agents and IDEs?
Let me start with a brief introduction to AI agents and IDEs (Integrated Development Environments).
Both AI agents and regular chatbots are powered by large language models (LLMs) — they can intelligently respond to natural language instructions. But the fundamental difference is:
This distinction is crucial and not immediately intuitive. Please think about it carefully. Once you truly understand it, you'll realise that our work patterns are on the brink of a revolution.
Now let's talk about IDEs. There are many such tools on the market:
- VS Code — an open-source platform by Microsoft
- Cursor — built on VS Code's core
- Trae — developed by a team in mainland China, also based on VS Code
- Qoder — another VS Code-based tool
An IDE, as the name suggests, is an integrated development environment — traditionally used by programmers to write code and debug programs. As a result, it's largely unknown outside of programming circles.
However, our training is NOT about programming, nor is it about the trending "vibe coding" (using AI to write software). What I want to introduce is the technique of using AI agents and IDEs to handle various document tasks, including:
- Writing academic papers
- Preparing reports and presentations
- Teachers grading assignments
- Preparing course materials
A Tangent on Innovation
What is the essence of innovation? Here's a tricky arithmetic puzzle: make 24 from the numbers 5, 5, 5, 1.
Why is it hard? Because the solution requires decimals:
- 1 ÷ 5 = 0.2
- 5 − 0.2 = 4.8
- 4.8 × 5 = 24
From this puzzle, we can see that one path to innovation is breaking out of fixed mental frameworks — like the assumption that 24-point games only involve whole number operations. Similarly, our AI agent training breaks the assumption that IDEs are only for programming — and that's where the spark of innovation lies.
Let's Get Hands-On
Step 1: Install an IDE — VS Code or Trae
This event is sponsored by the Trae team. Workshop participants will receive complimentary Trae tokens (valid for 3 days).
Search "VS Code download" or "Trae install" in your browser, and follow the installation steps.
Screenshots: IDE Layout & Initial Setup (5 images)
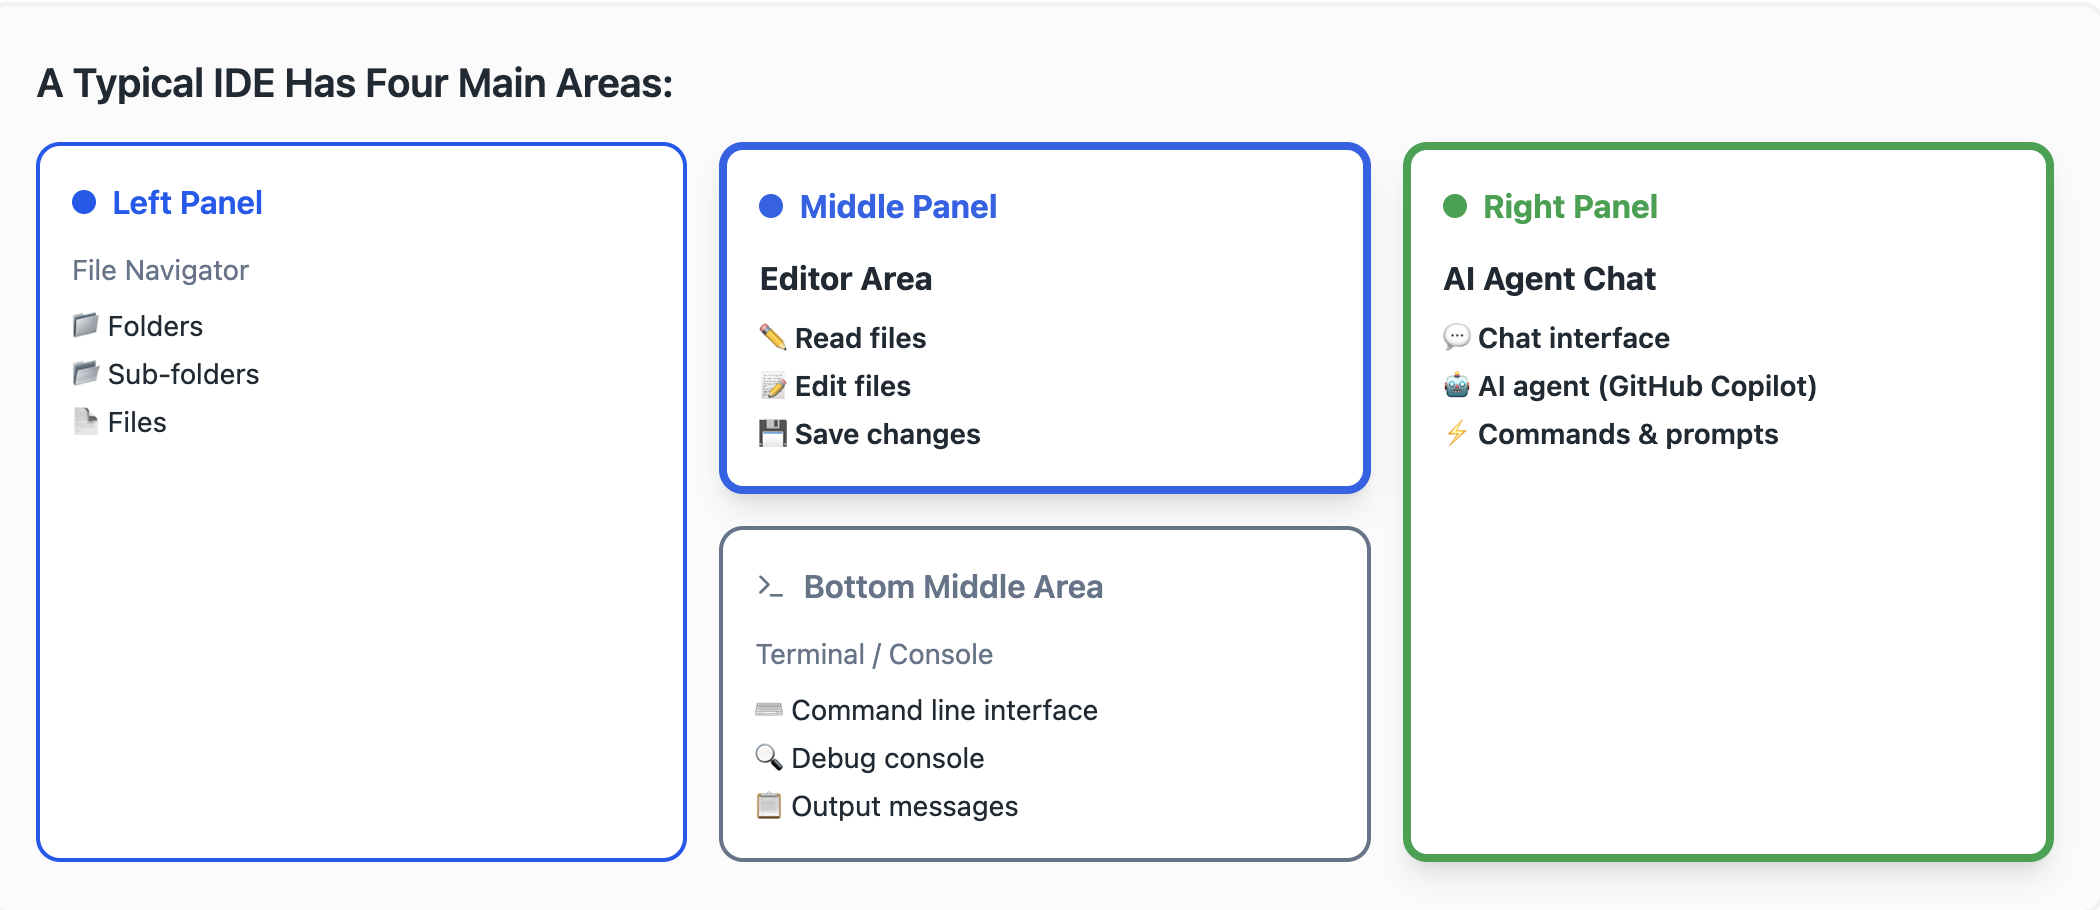
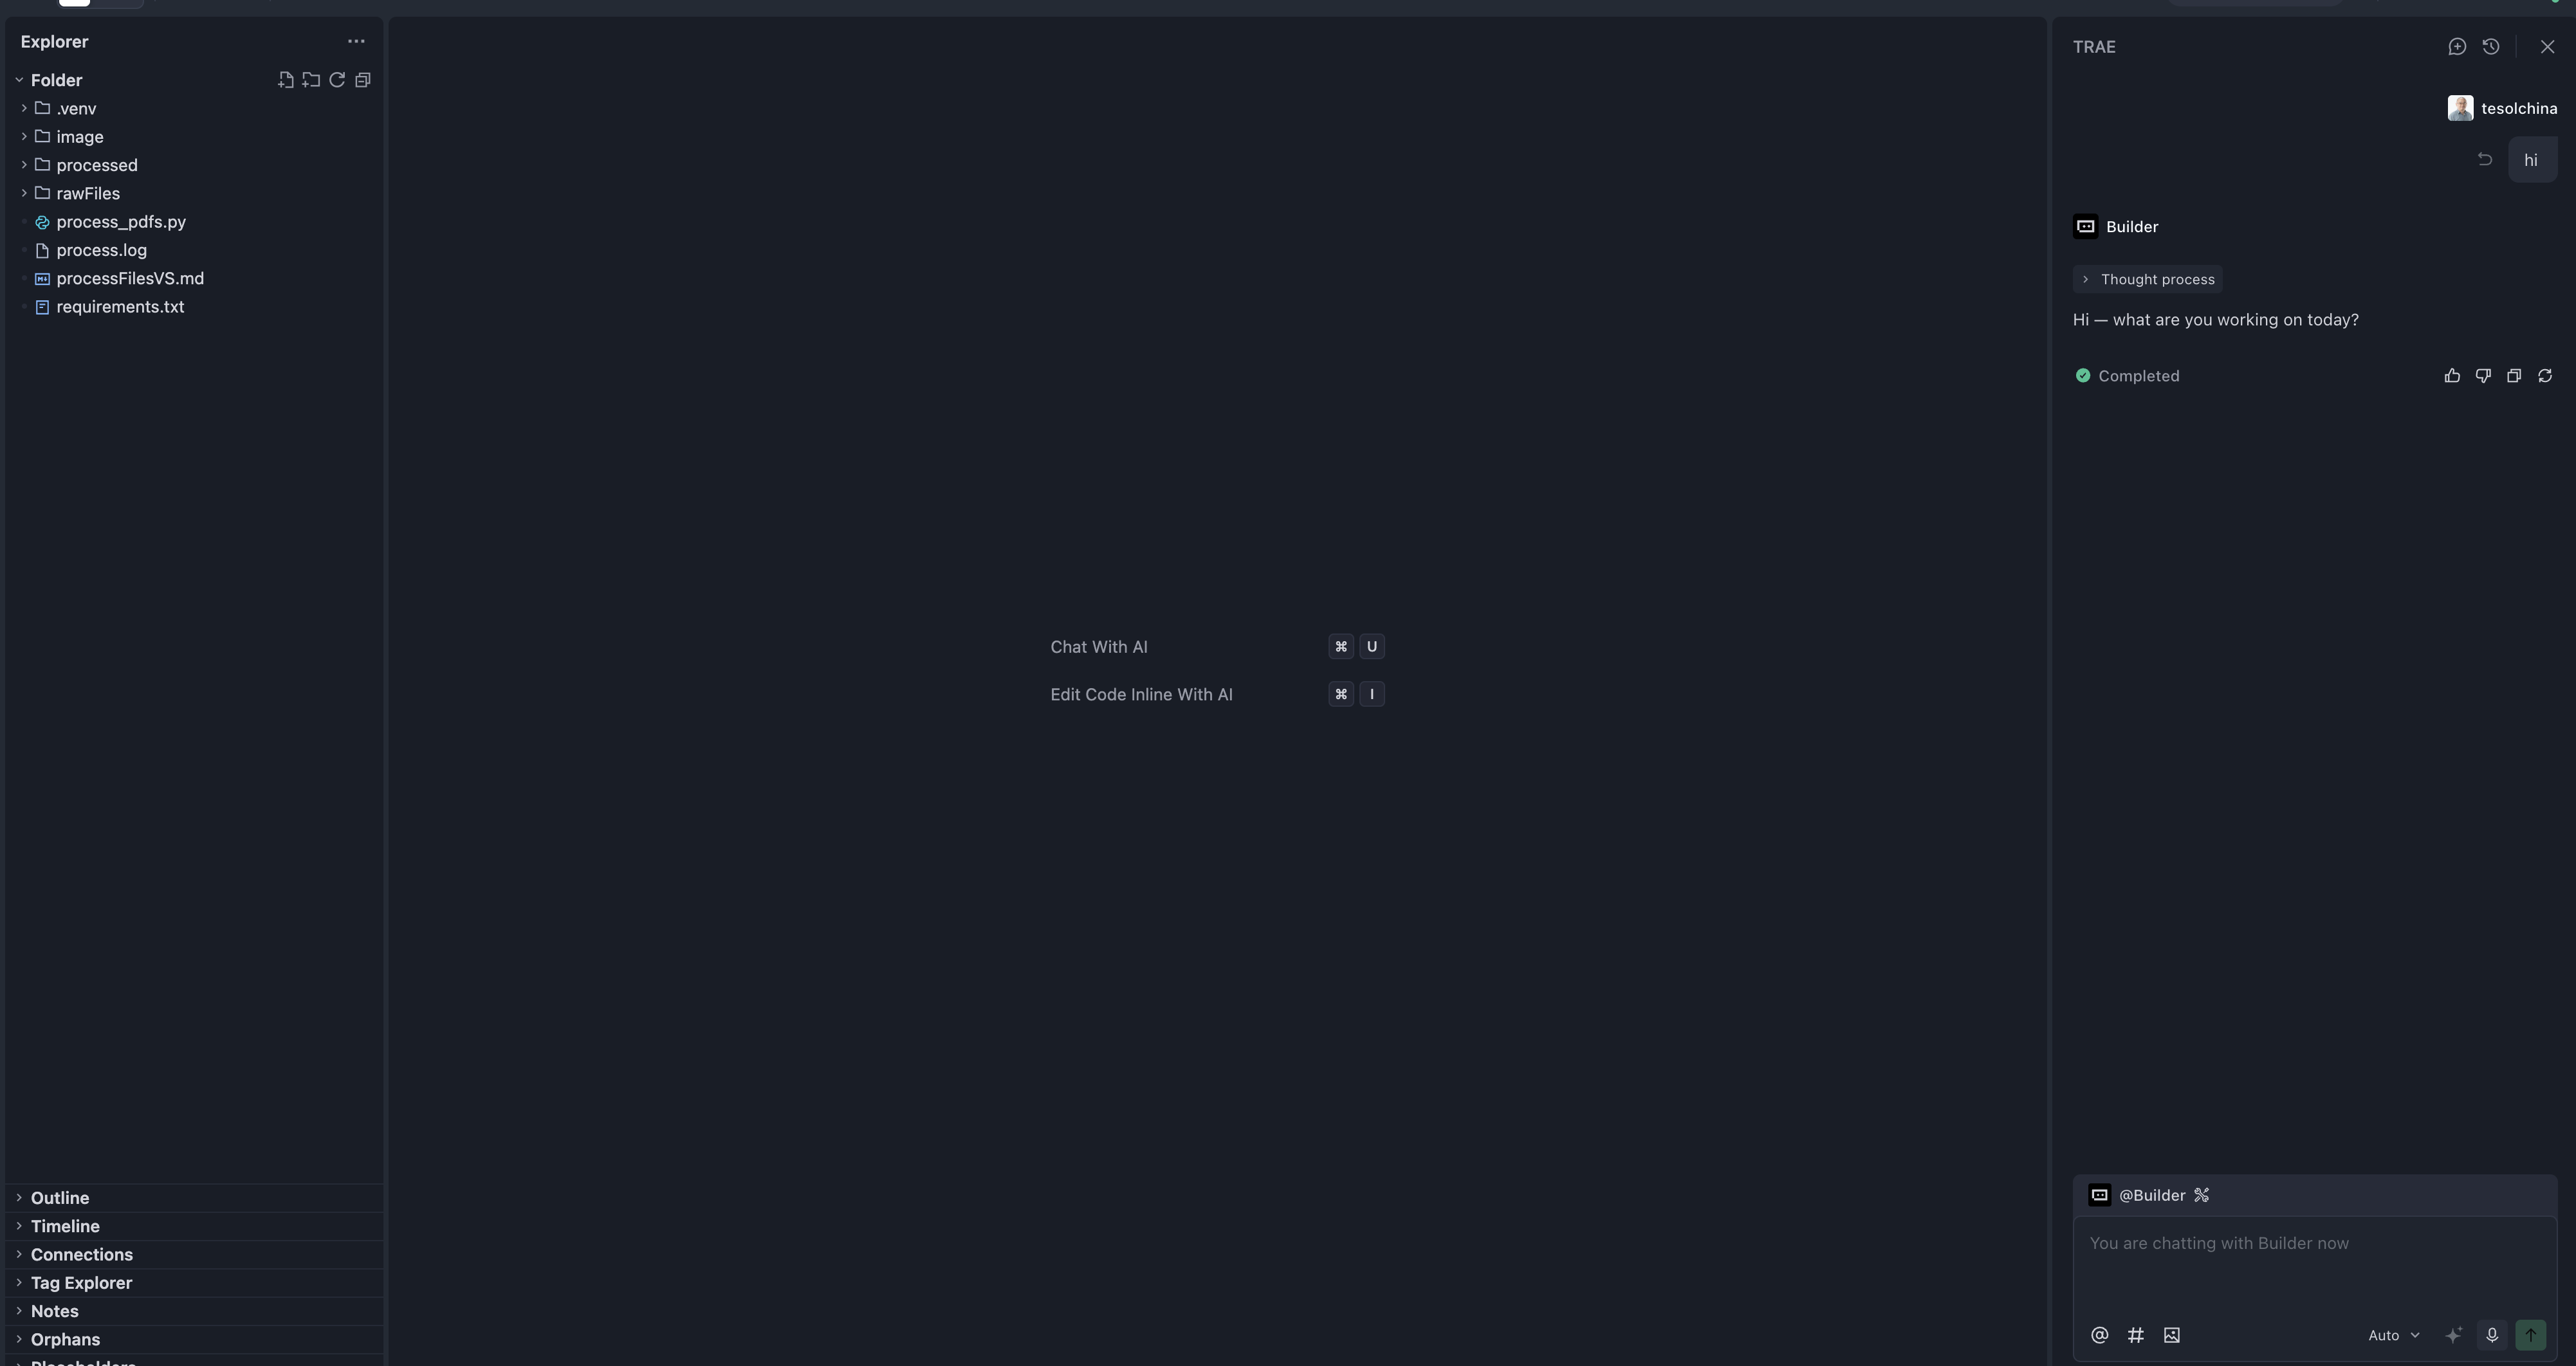
The IDE layout: file explorer (left), file editor (centre top), terminal (centre bottom), AI agent chat (right)
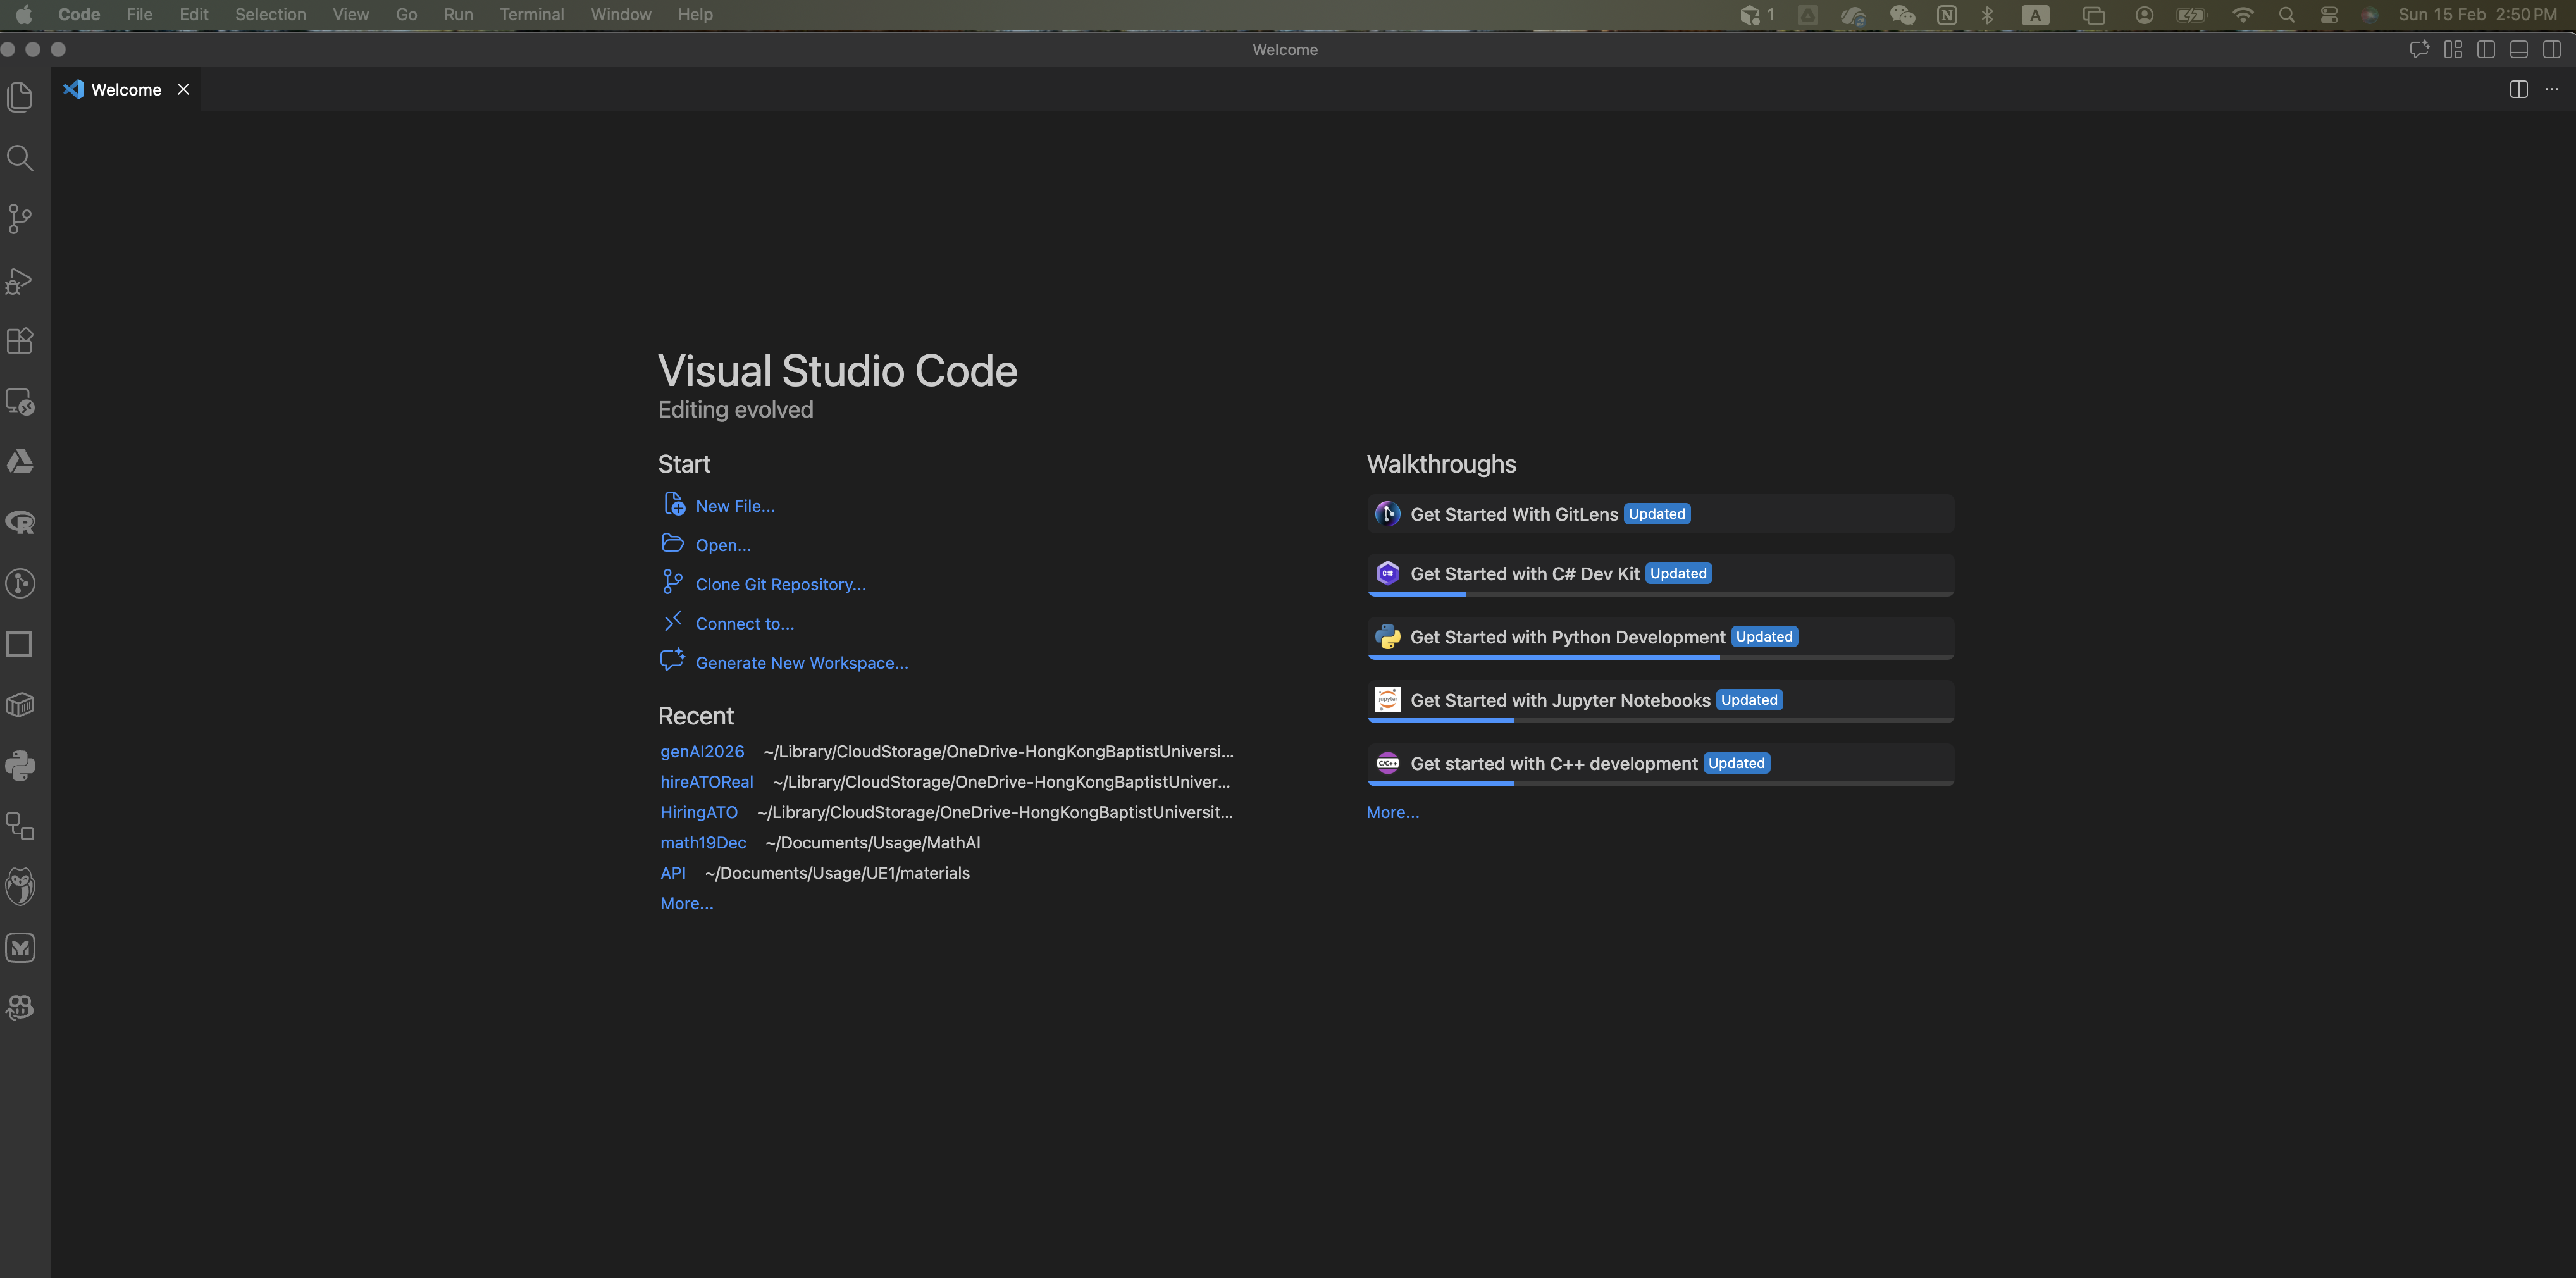
VS Code initial page
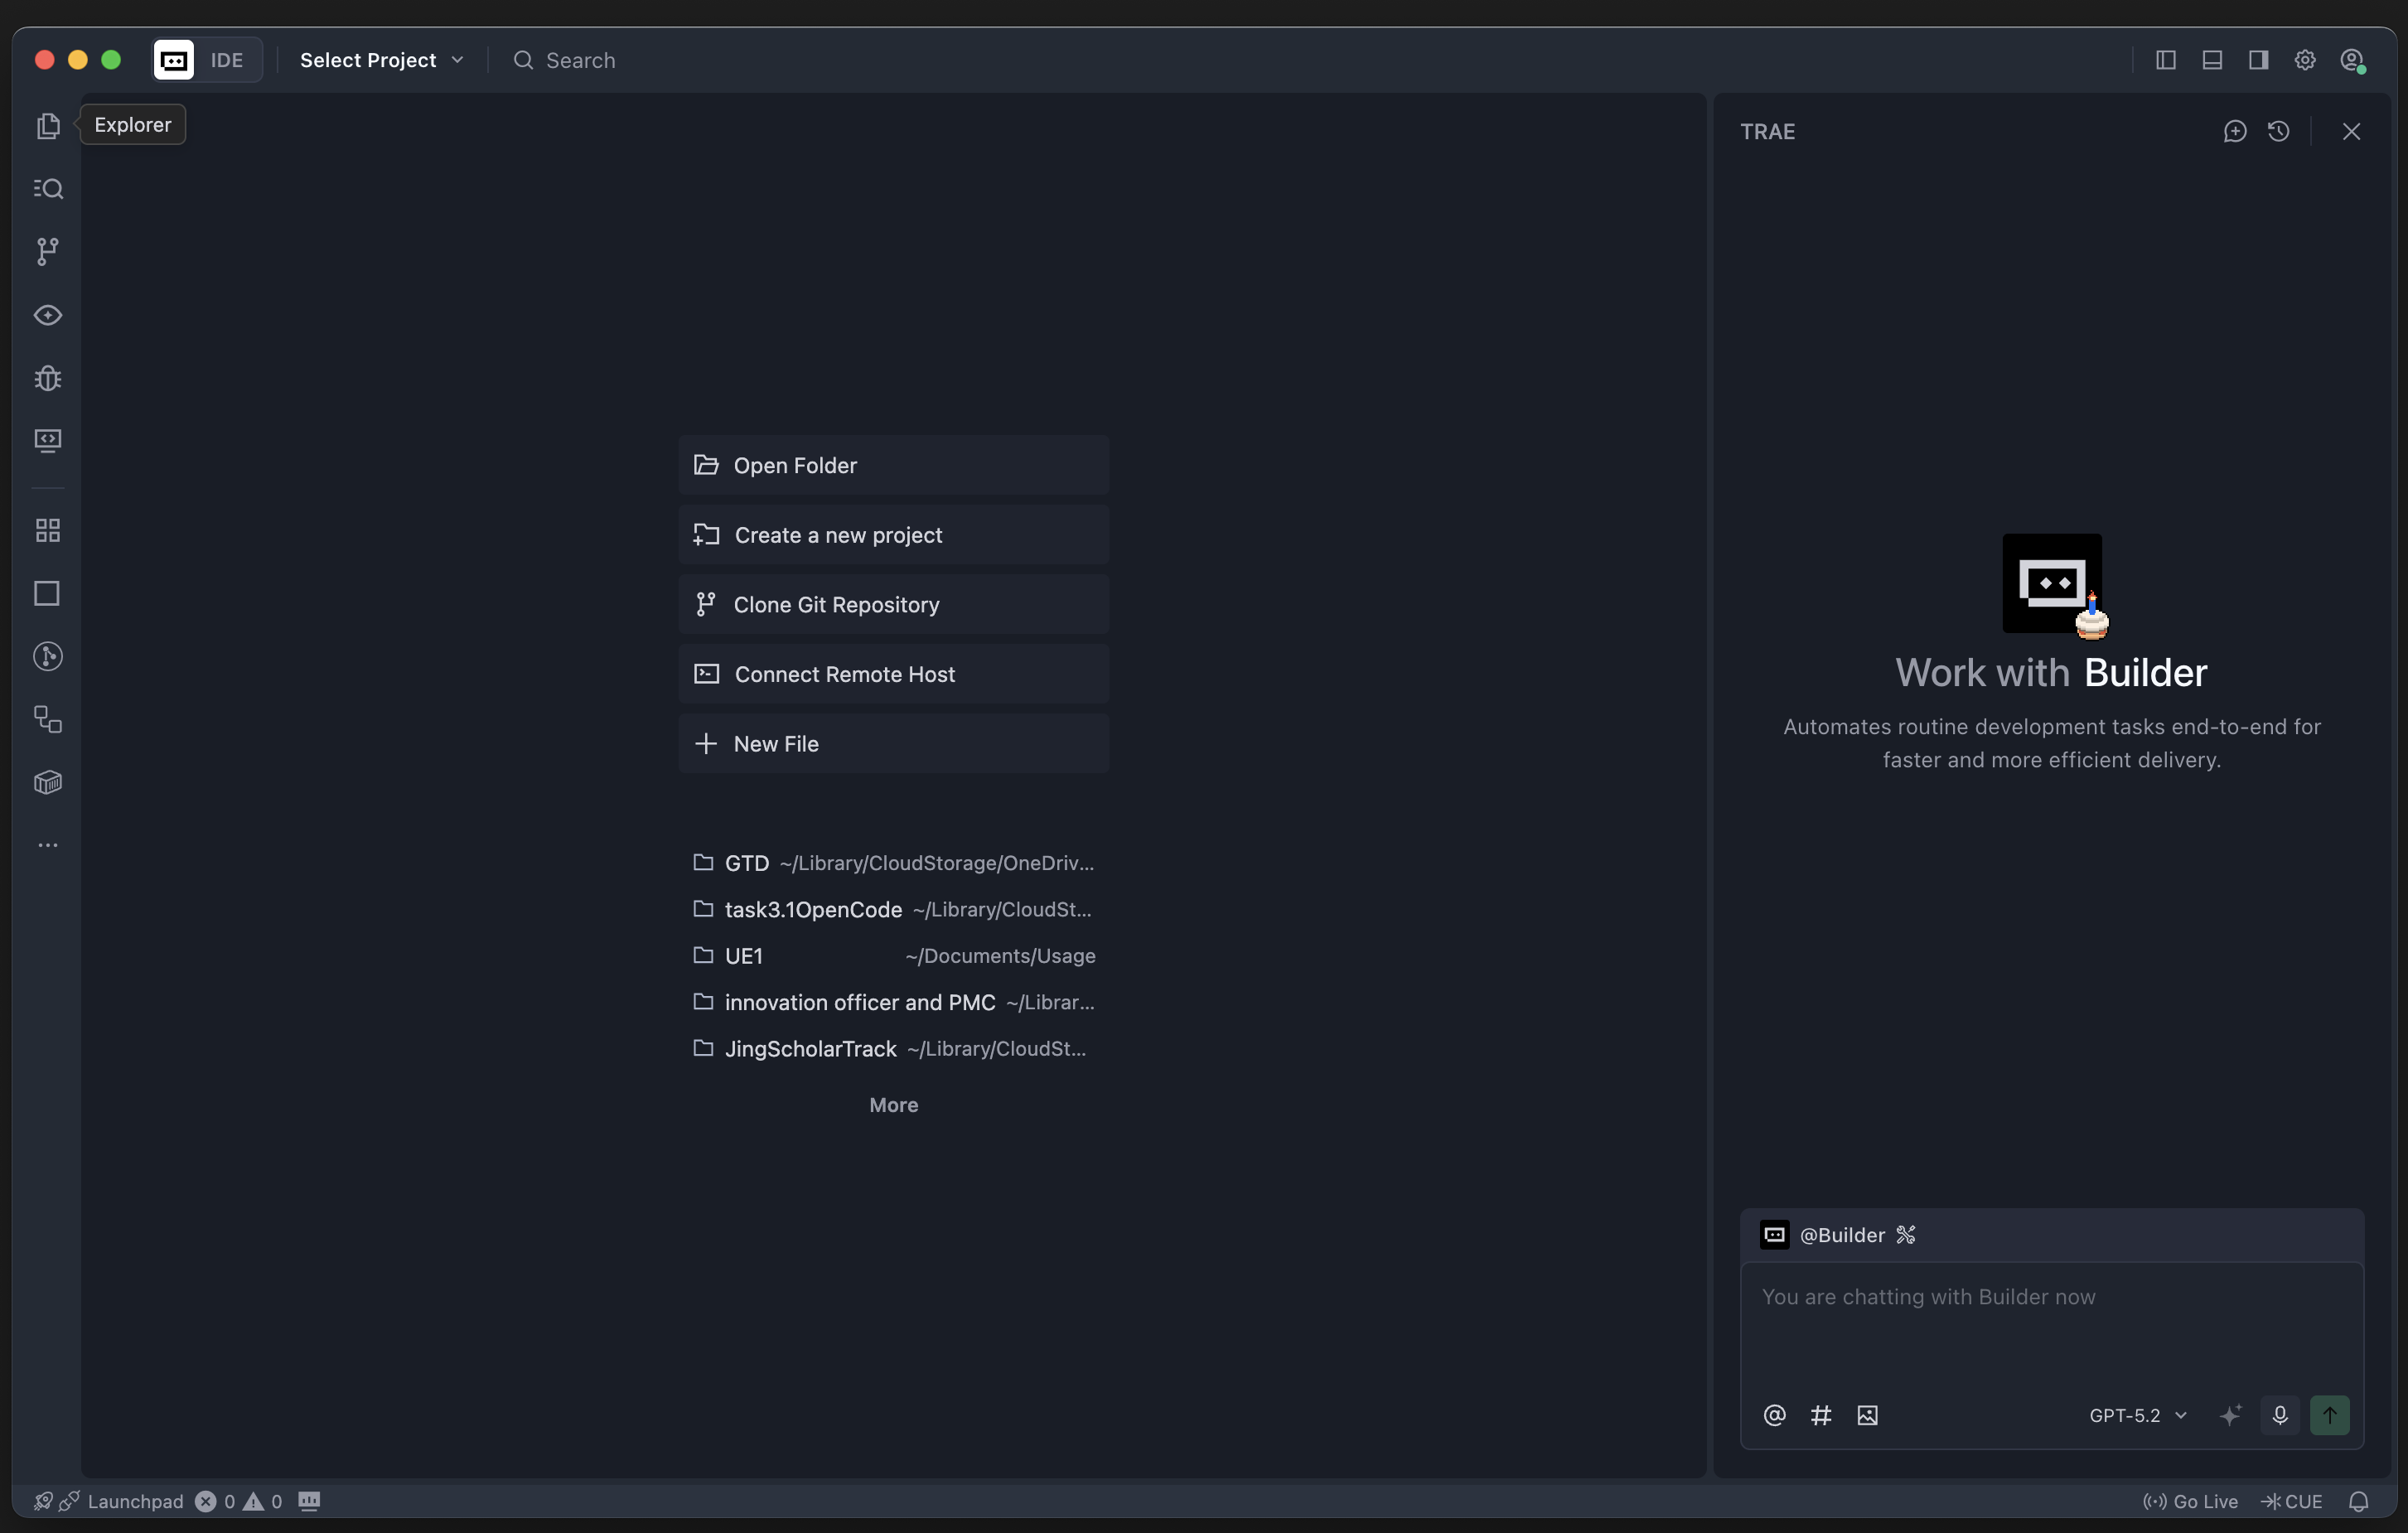
Trae initial page
Note the icons in the top-right corner: left icon opens the file browser & tool panels, right icon toggles the AI agent chat panel

VS Code with both panels open
As shown above, the IDE has several key areas:
- Left panel — File explorer: view local folders, create subfolders and files (manually or through the AI agent)
- Centre top — File reader/editor
- Centre bottom — Command line / terminal
- Right panel — AI agent chat area
Step 2: Set Up AI Agent Chat
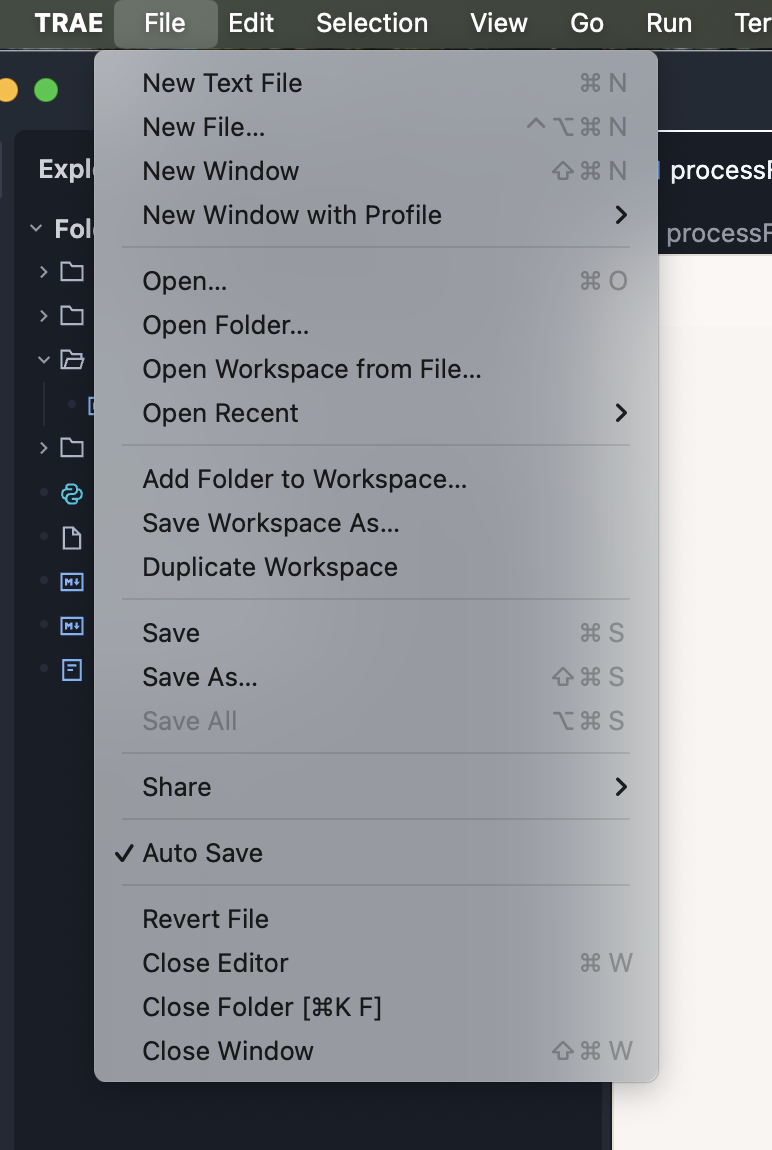
In VS Code, select "Agent" mode:
Screenshots: Agent & Builder Mode Selection (2 images)
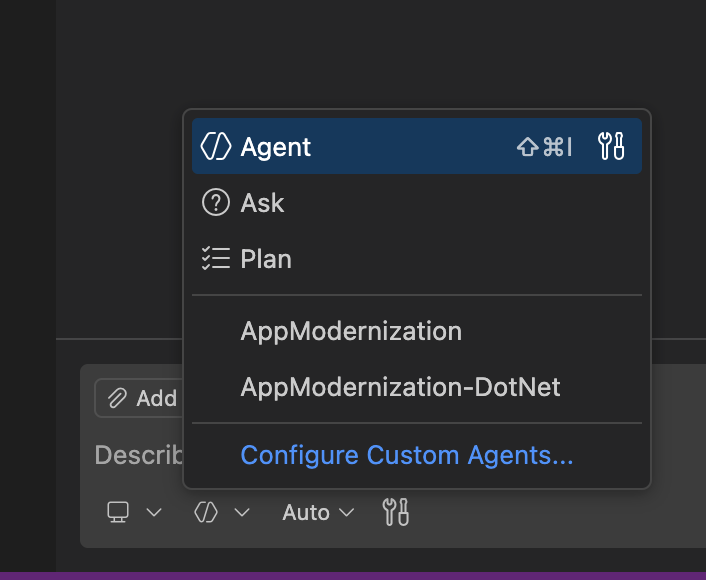
Select "Agent" mode in VS Code
In Trae, select "Builder" mode:
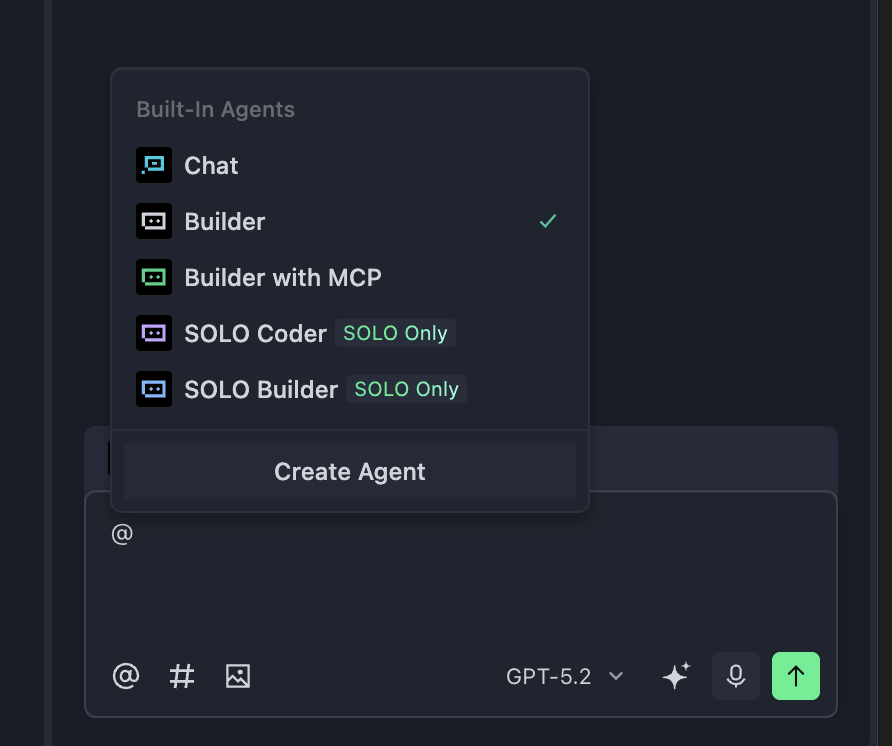
Select "Builder" mode in Trae
Now try chatting with the AI agent in VS Code or Trae — say Hi!
For VS Code, you need to register a GitHub account. I recommend using your university email and applying for education benefits:
For Trae, you need to register a Trae account.
Step 3: Open a Folder
When you try chatting with Trae without a folder selected, the agent will ask you to open one:
Screenshots: Opening & Creating a Folder (4 images)
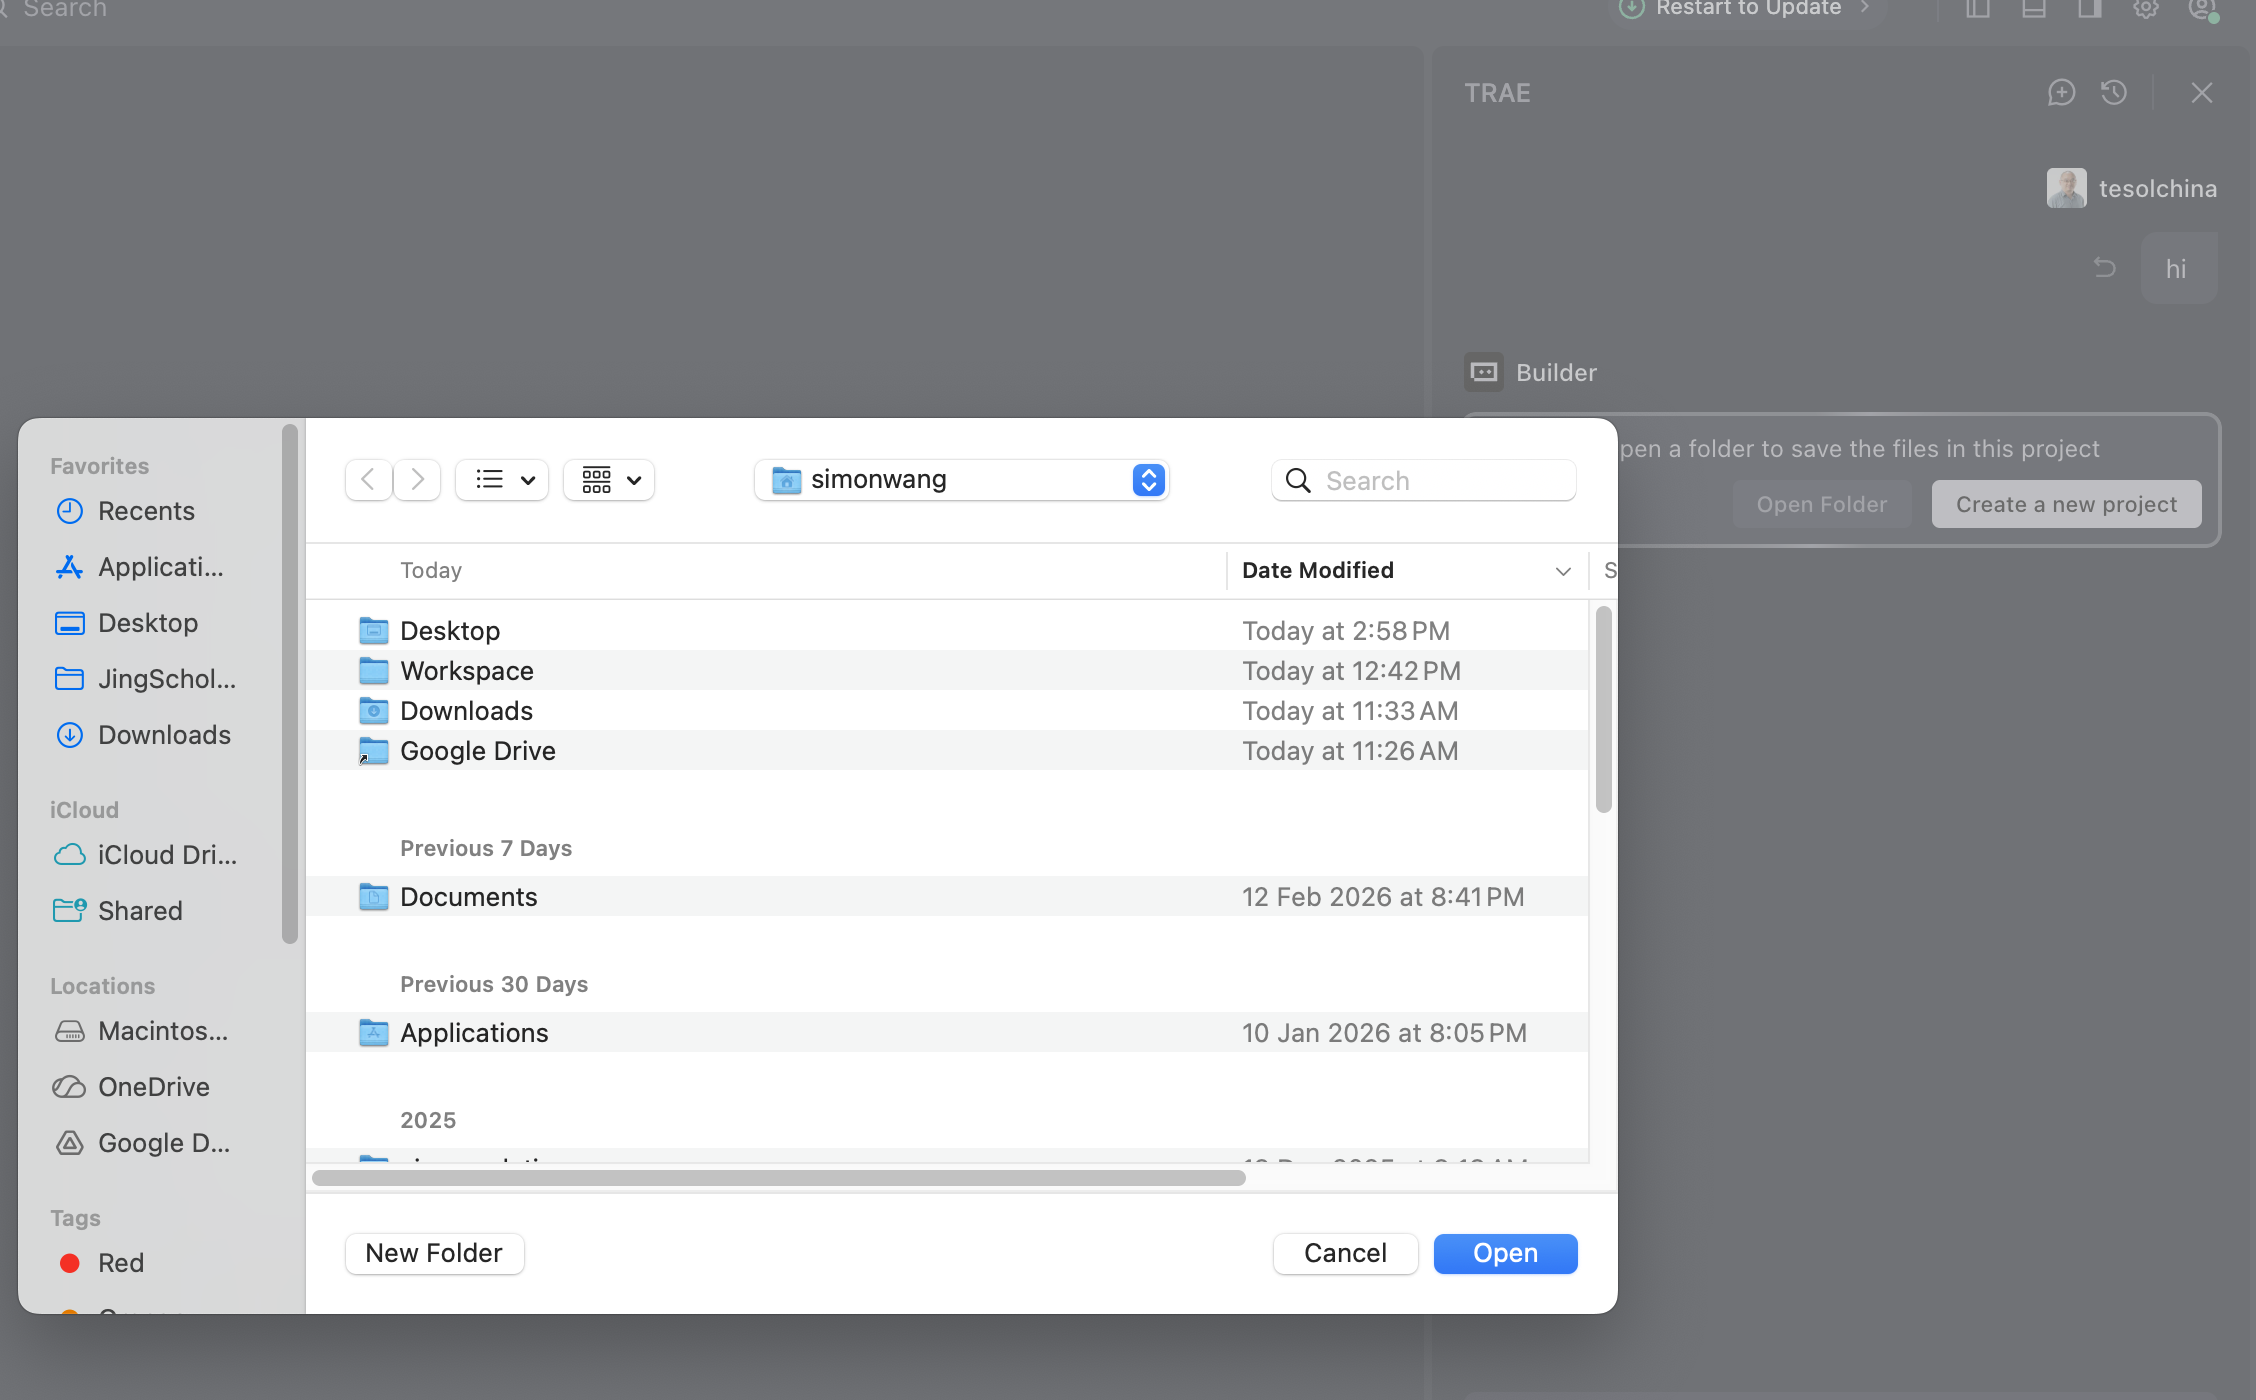
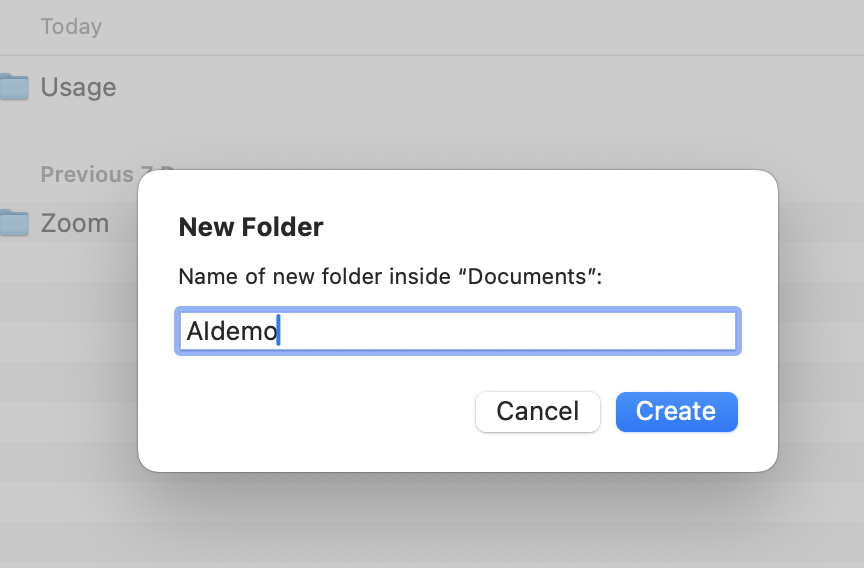
At this point, you can create a new folder:
Create a new folder for the demo
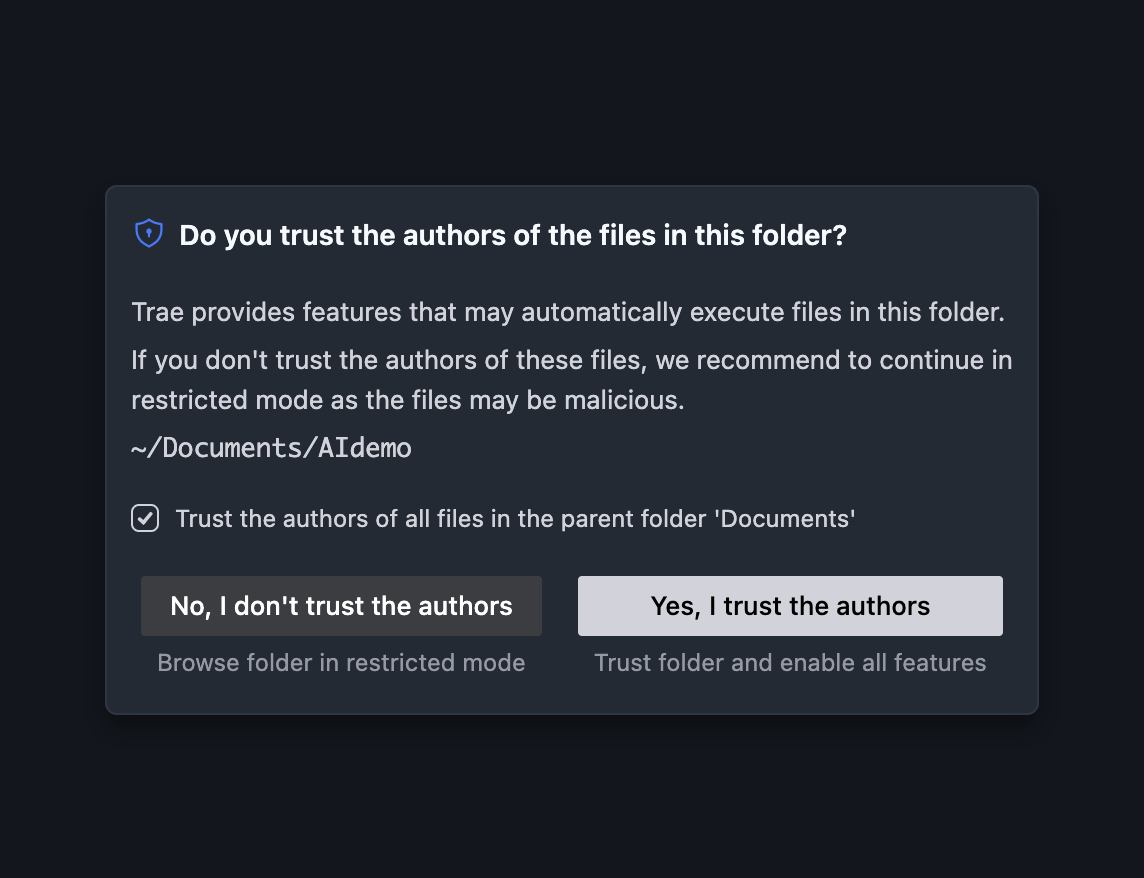
Both Trae and VS Code will ask you to authorize reading local files and will ask about file security. Be bold — nothing ventured, nothing gained! 😄
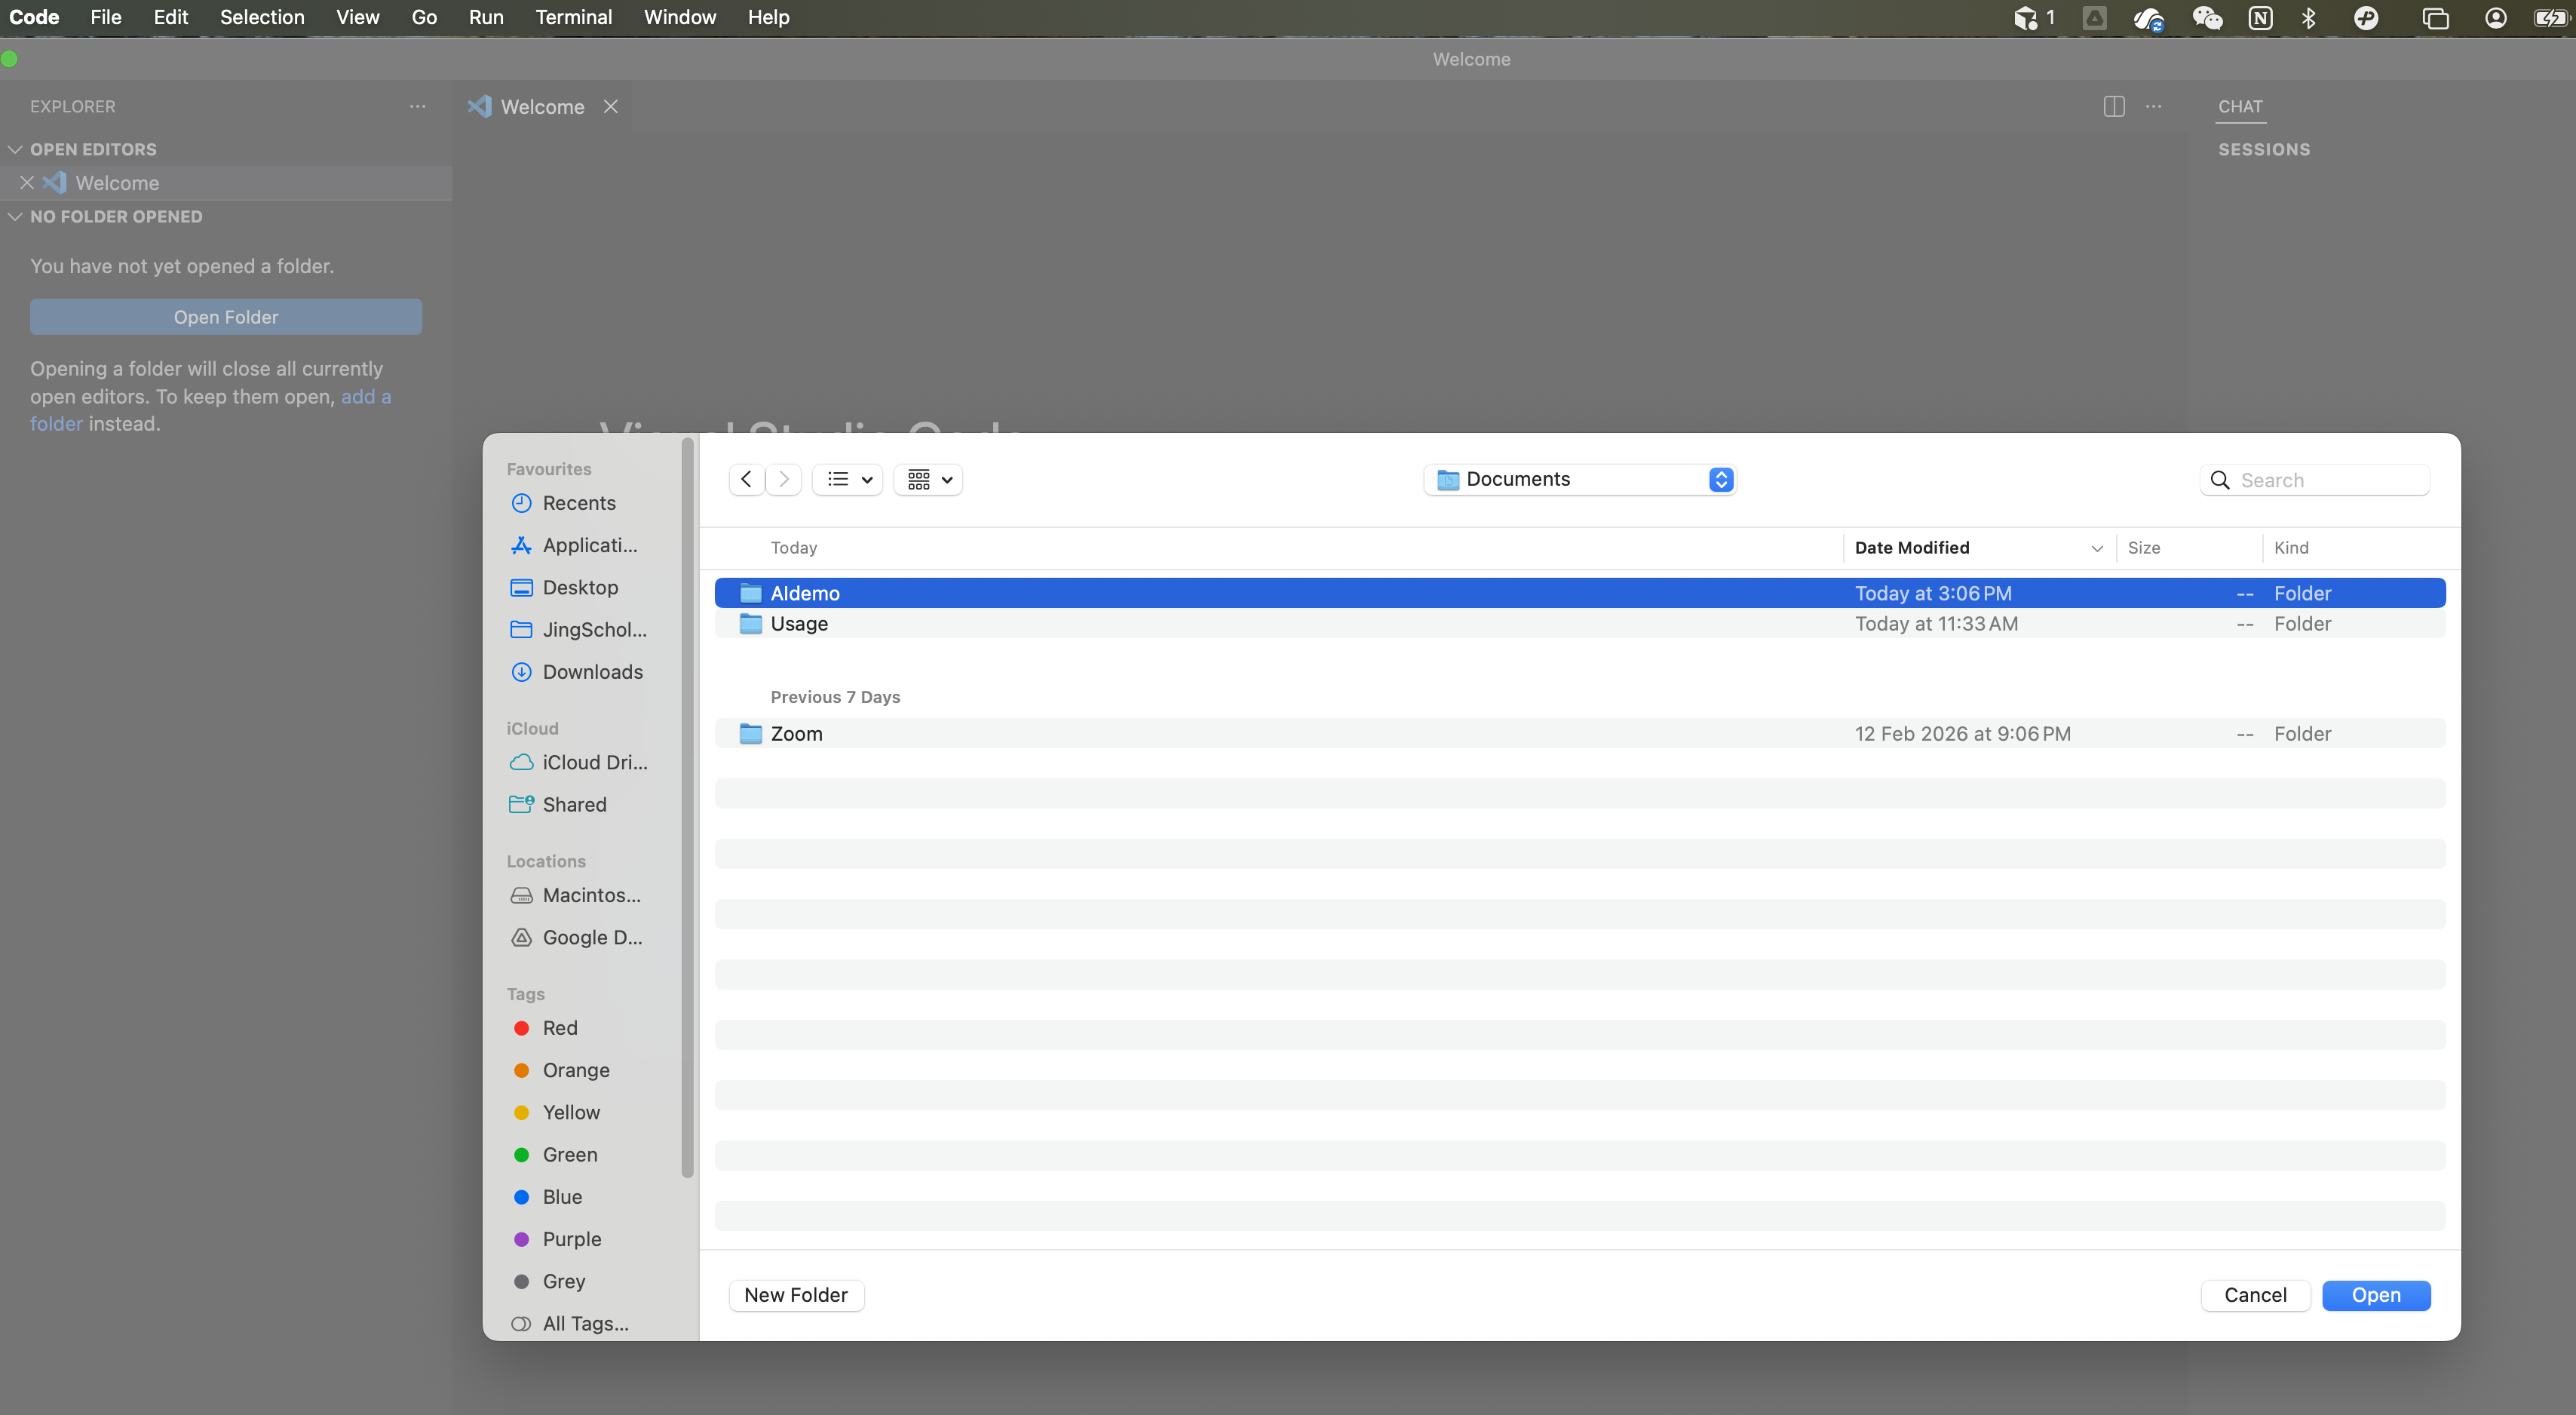
Authorize the IDE to read local files
Similarly, open this newly created folder in VS Code.
Our First Task: Converting PDF/PPTX to Markdown
This is our first hands-on operation: converting PDF, Word, and PPTX files — common but "messy" formats — into Markdown, a machine-readable format.
Let me briefly explain the concept of machine-readable. PDF, Word, and PPTX are proprietary file formats developed by private companies. To read and edit them, you need tools developed by those companies (Adobe, Microsoft Office, etc.). If you send these files directly to an LLM, it will try to process them but often struggles. Therefore, we first need to clean these files into Markdown format. (For now, we'll skip handling images, charts, and complex formatting to keep things simple.)
First, create a new folder called rawFiles, then drop a couple of files in it — a PDF and a PPTX:
Screenshots: Setting Up rawFiles Folder (3 images)

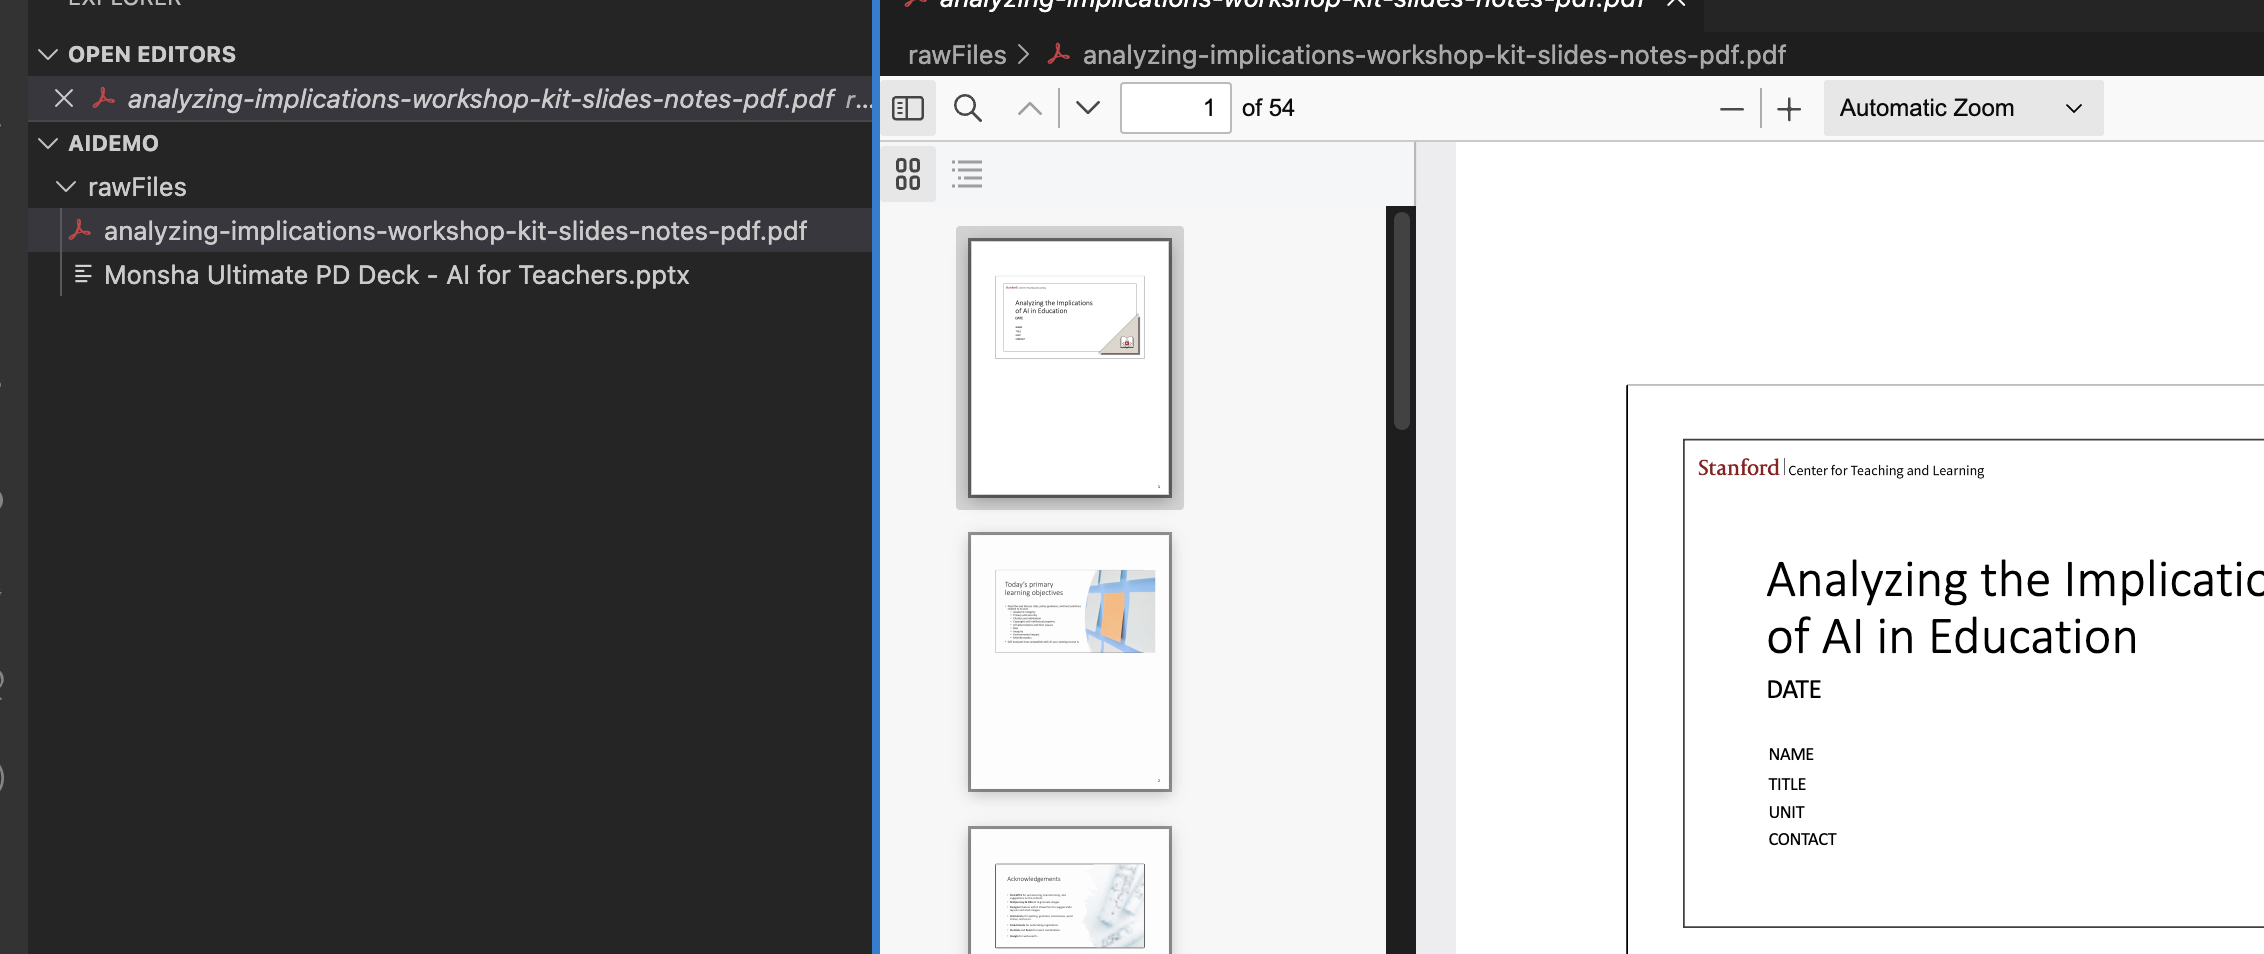
rawFiles folder containing a PDF and a PPTX
Demo 1: Using VS Code to Convert PDF to Markdown
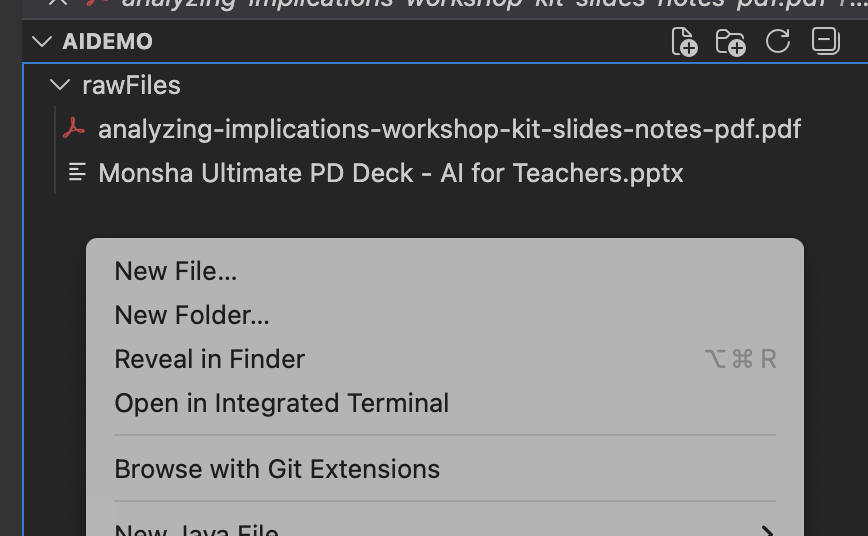
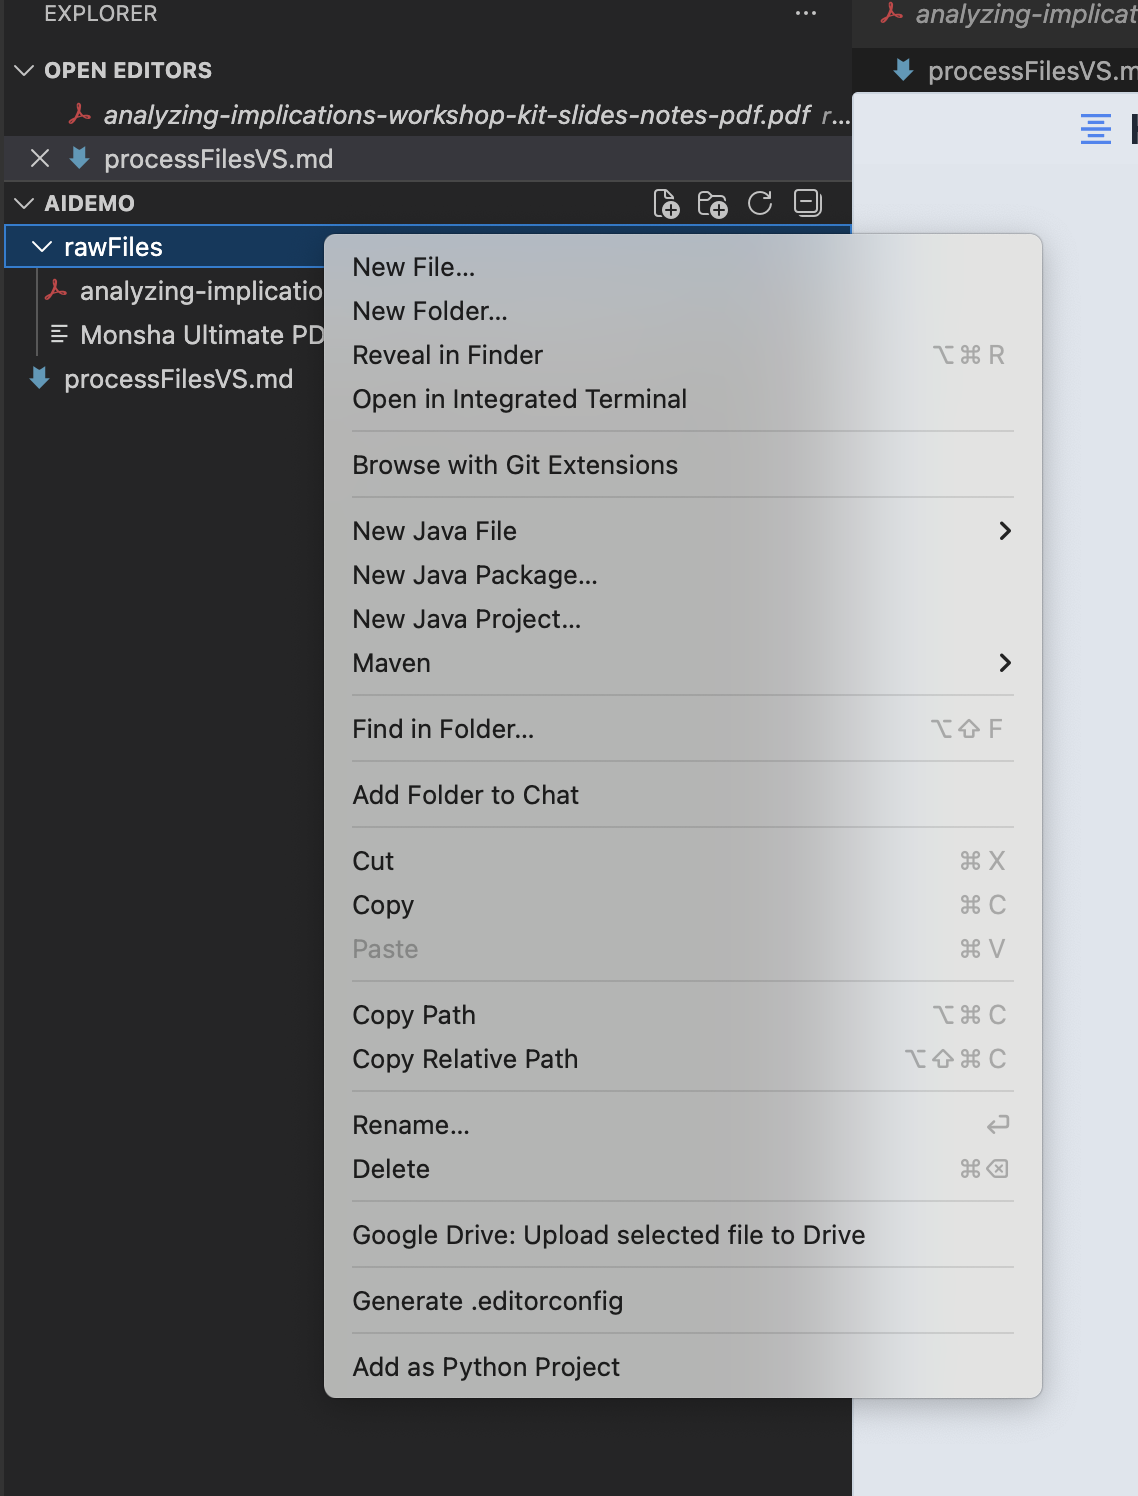
Next, create a new file called processFilesVS.md and edit it.
In this file, I first copy and paste the path to the rawFiles folder.
This operation is extremely important — it's arguably the core technique when using AI agents. Providing exact file paths tells the agent precisely where to find and place files.
Screenshots: Copy Path & Edit Prompt File (3 images)
Copy-pasting the rawFiles folder path — the core technique

Click the VS Code icon to edit the file
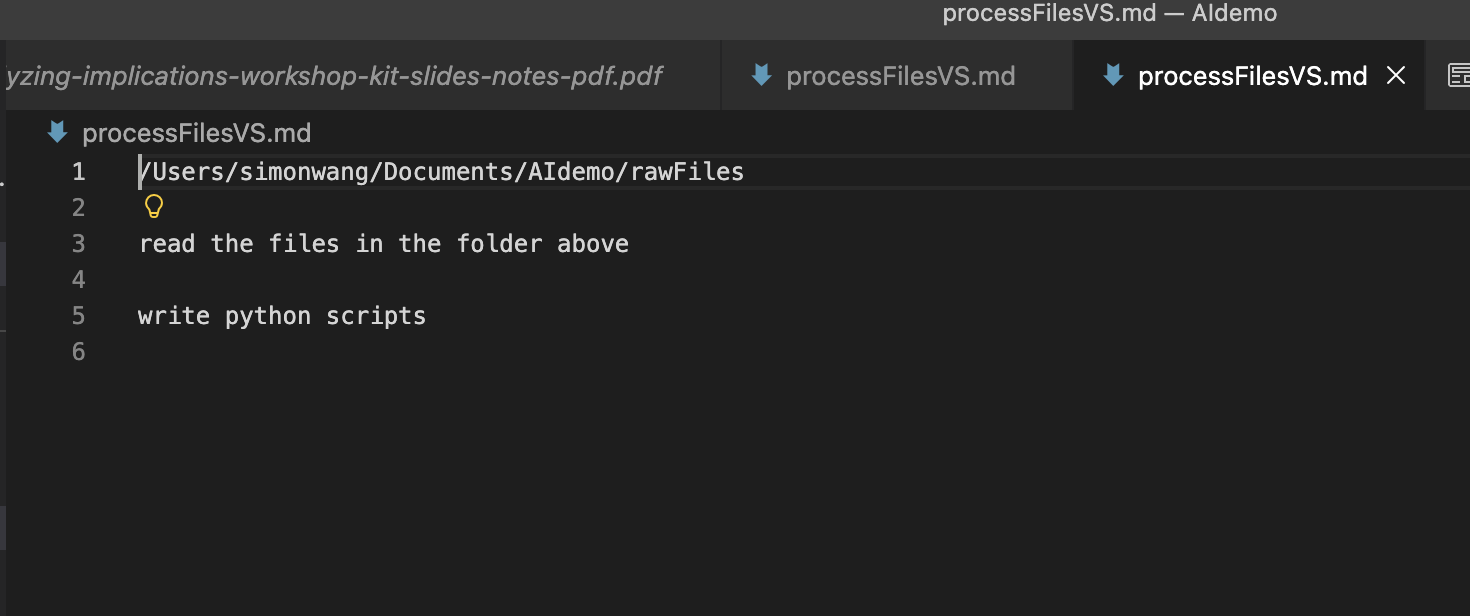
The content of processFilesVS.md
Here is the content of processFilesVS.md:
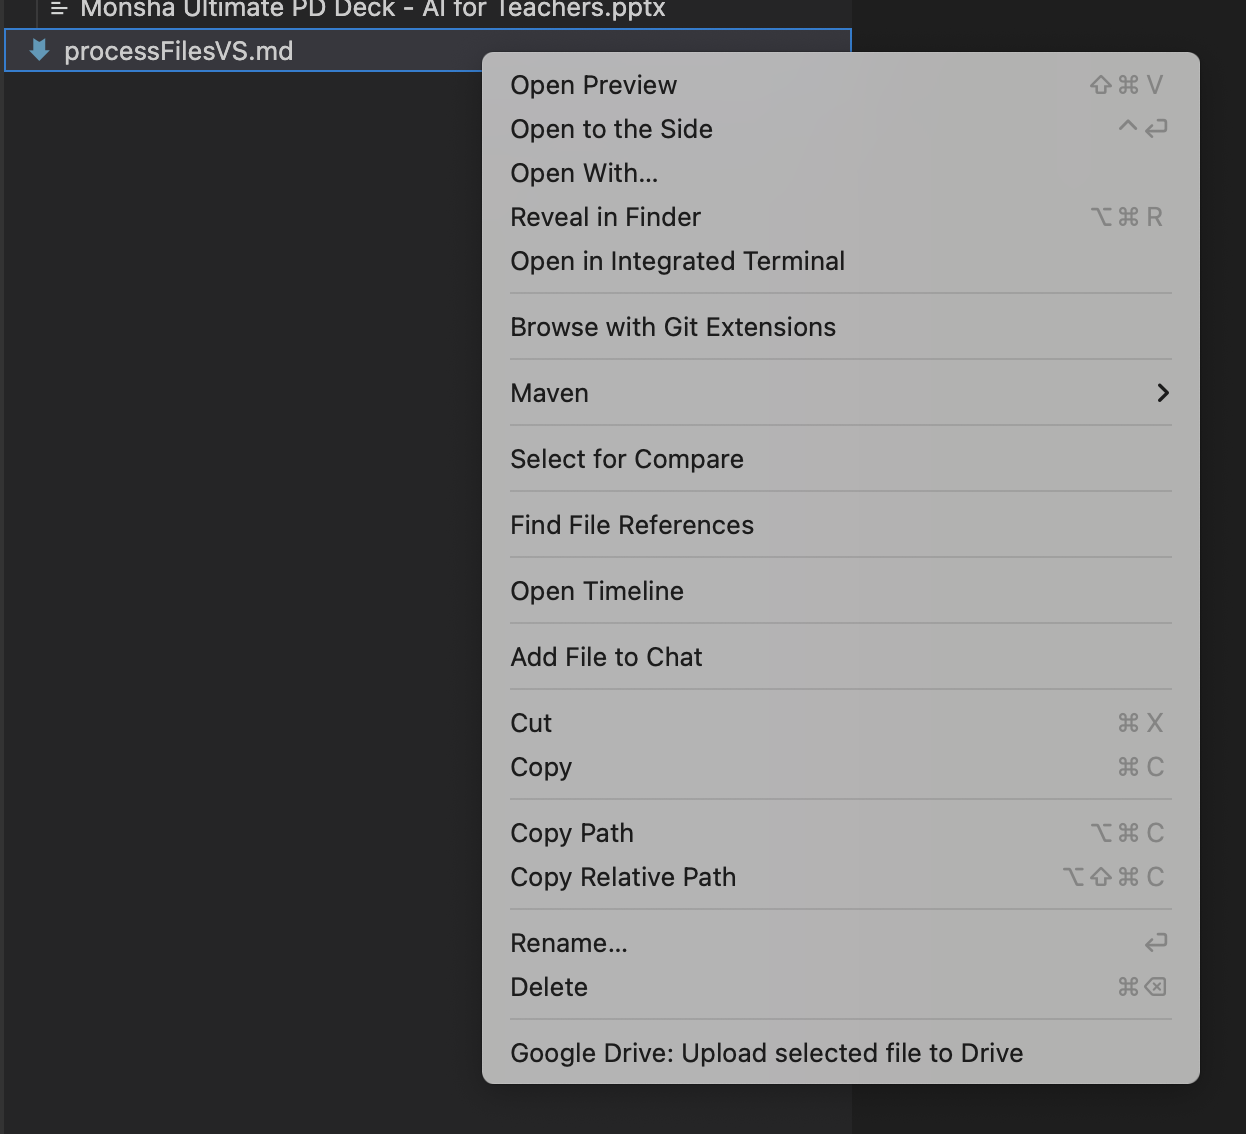
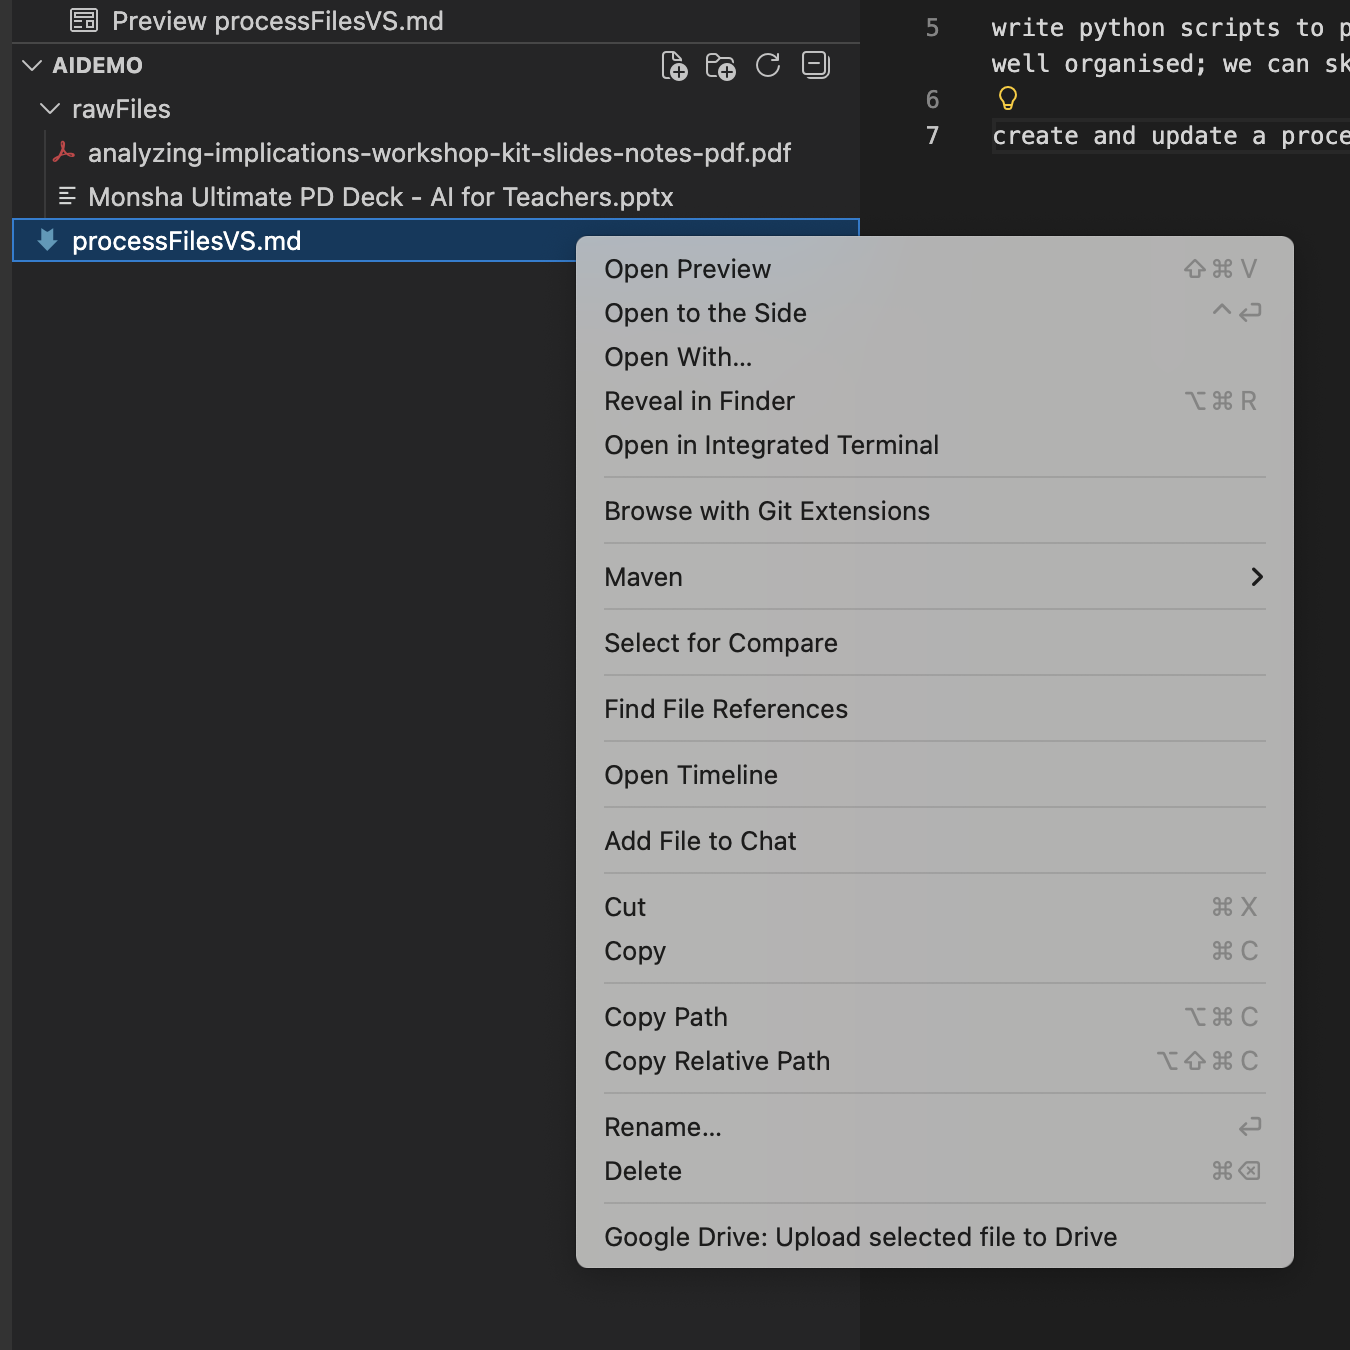
Next, we copy the file path of processFilesVS.md and send it to the AI agent:
Screenshots: VS Code Agent in Action (11 images)
Sending the file path to the agent — and the magic begins!
The moment of magic! Watch the agent work through the task:
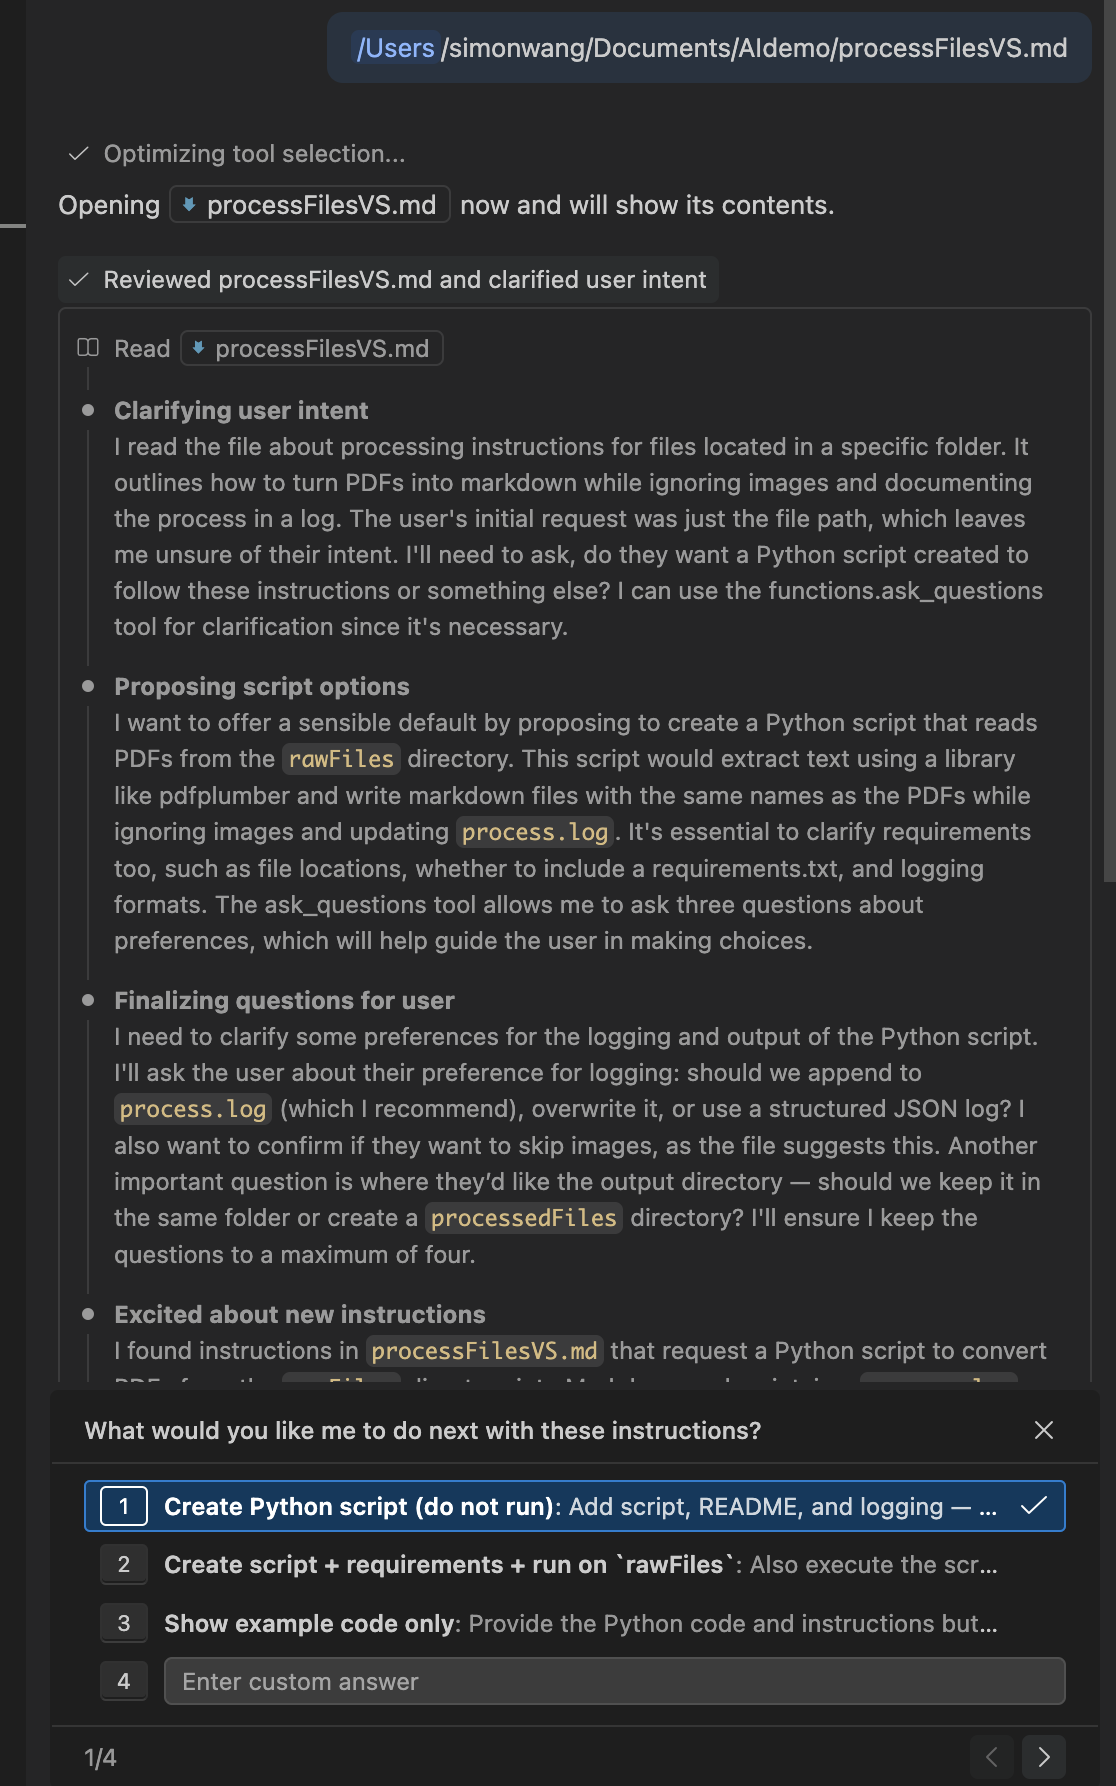
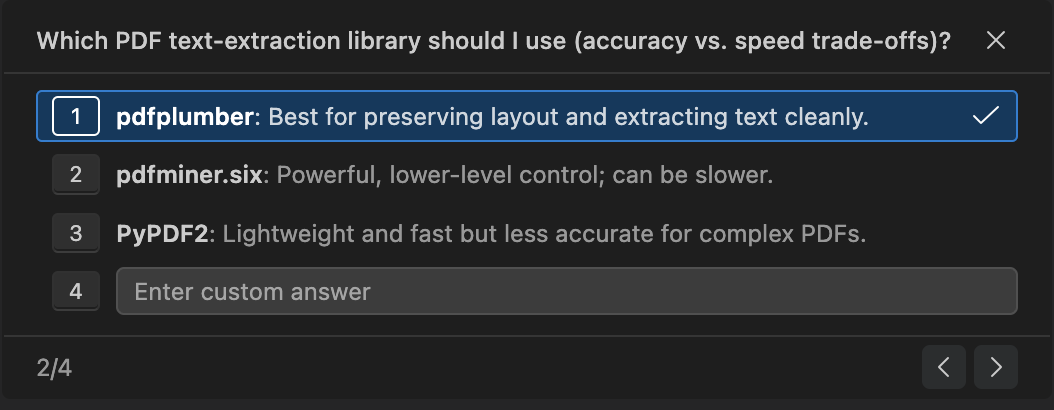
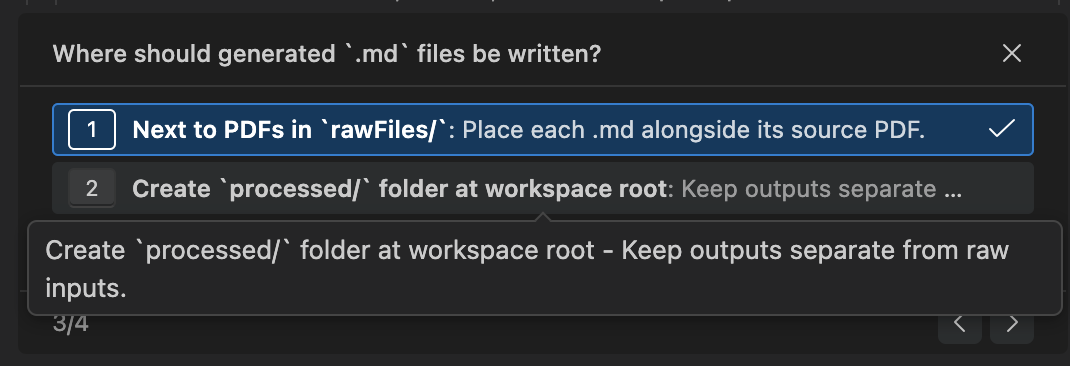
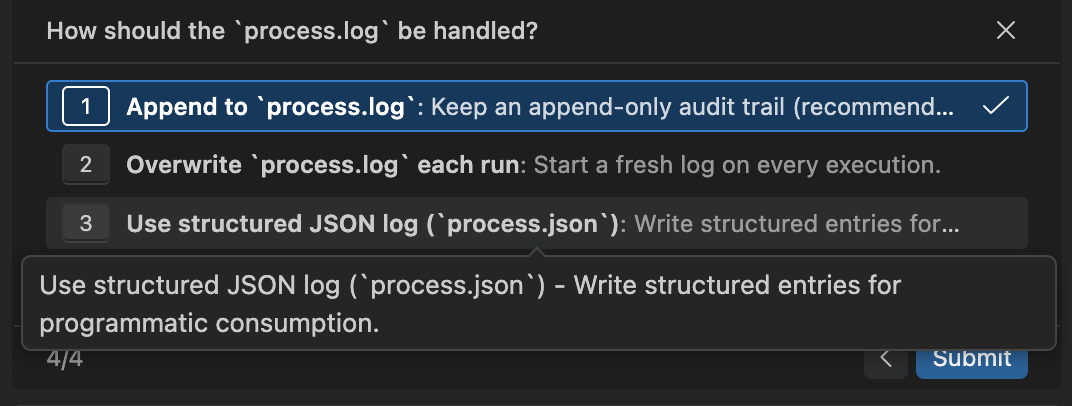
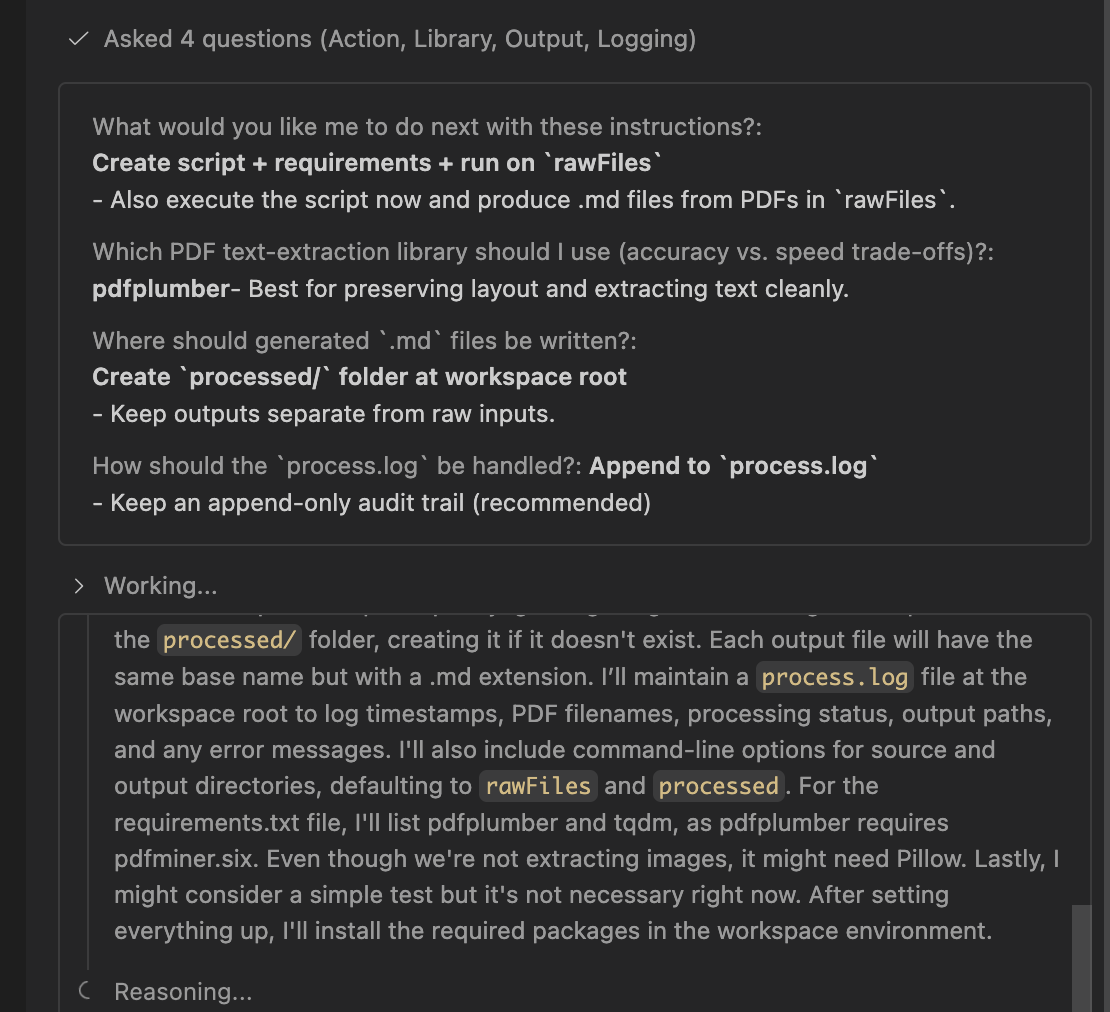
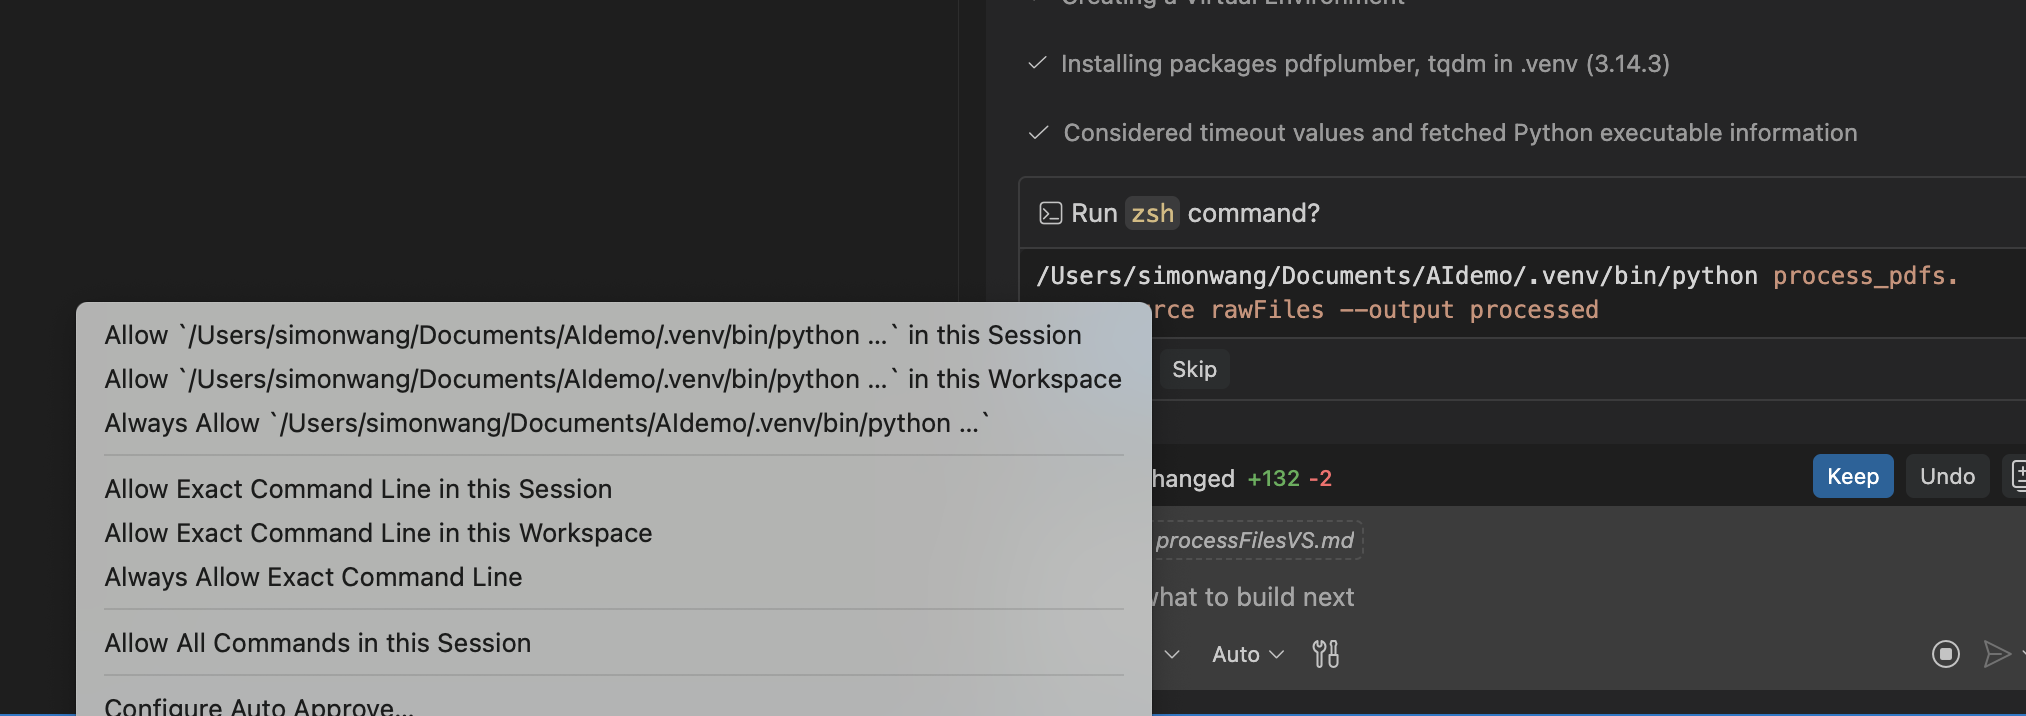
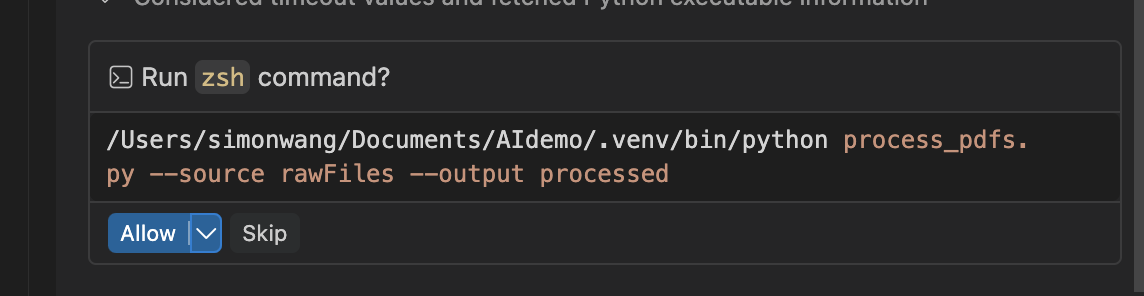
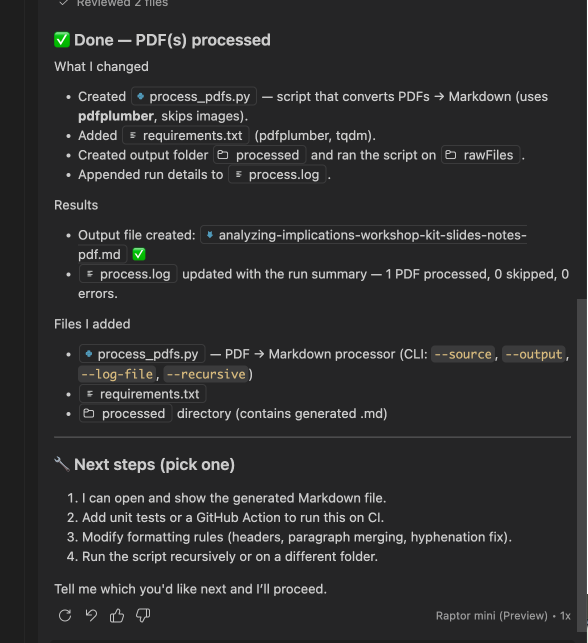
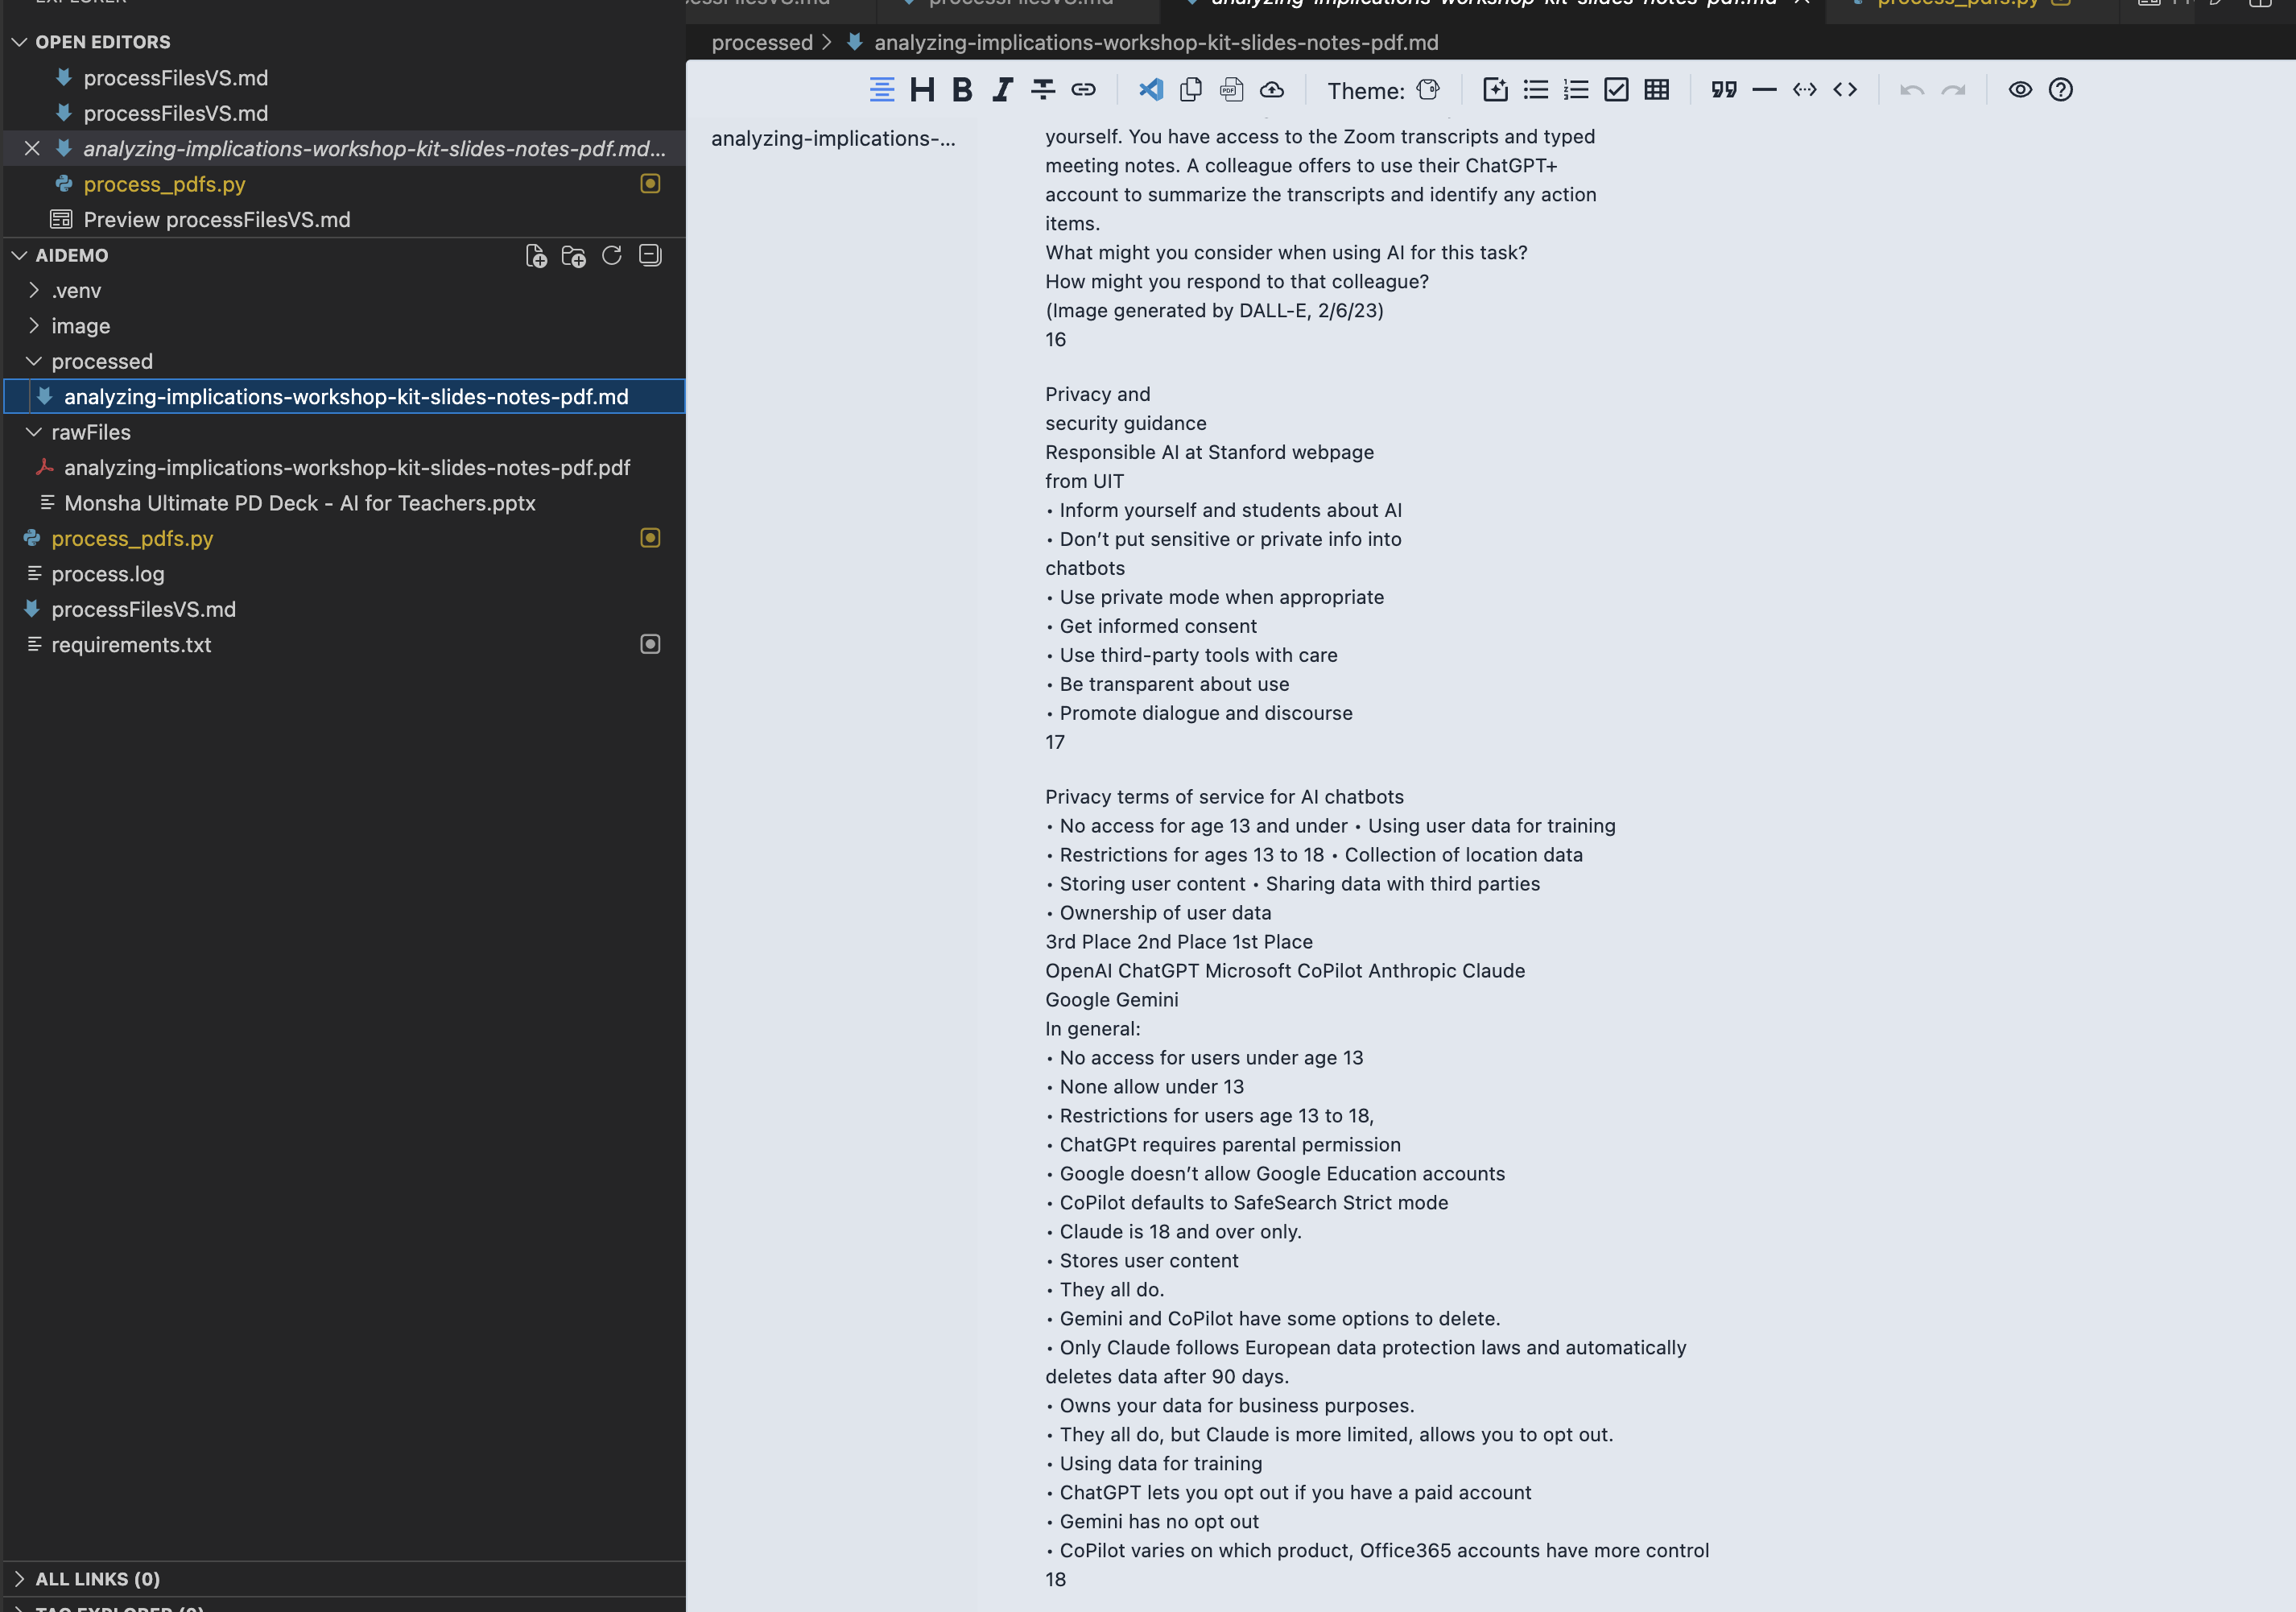
The VS Code agent reads the prompt file, asks a few questions, writes Python scripts, and successfully converts the PDF to Markdown
Here, VS Code read the prompt file, asked a few questions, then completed the operation and successfully converted the PDF to Markdown format.
The .venv folder now contains a lot of code — generated by AI — to accomplish the file format conversion.
The Core Workflow
By this point, you should already understand the AI agent workflow. The core idea is to write the task for the agent into a file (like processFilesVS.md), which contains:
- Input — where to find the files to process
- Instructions — what to do with them (e.g., convert to Markdown)
- Output — what the output should look like and where to save it
Once you have this basic approach, you can modify and adapt the workflow to suit your specific tasks.
Demo 2: Using Trae to Convert PPTX to Markdown
Back in Trae, we can see the folder already has many files from the VS Code demo.
Screenshot: Trae File Explorer (1 image)
Trae showing the same folder with files already created by VS Code
Create a new file called processFilesTrae.md with slightly modified content:
Remember to set auto-save in both IDEs!
Screenshots: Trae Builder in Action (5 images)
Remember to enable auto-save in your IDE settings
Now send the path /Users/simonwang/Documents/AIdemo/processFilesTrae.md to Trae:
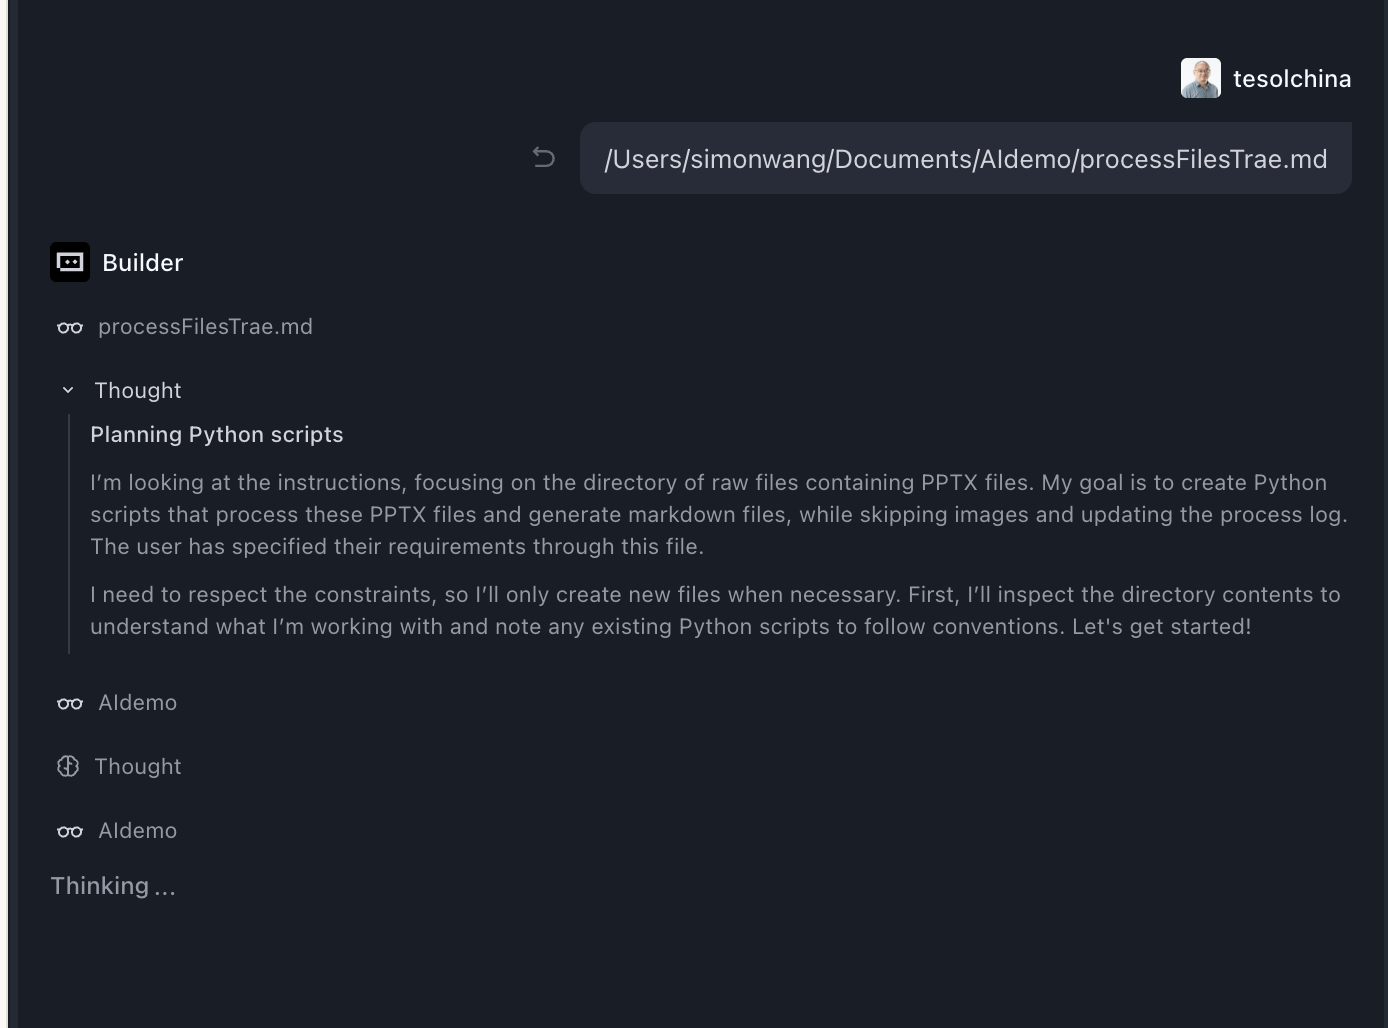
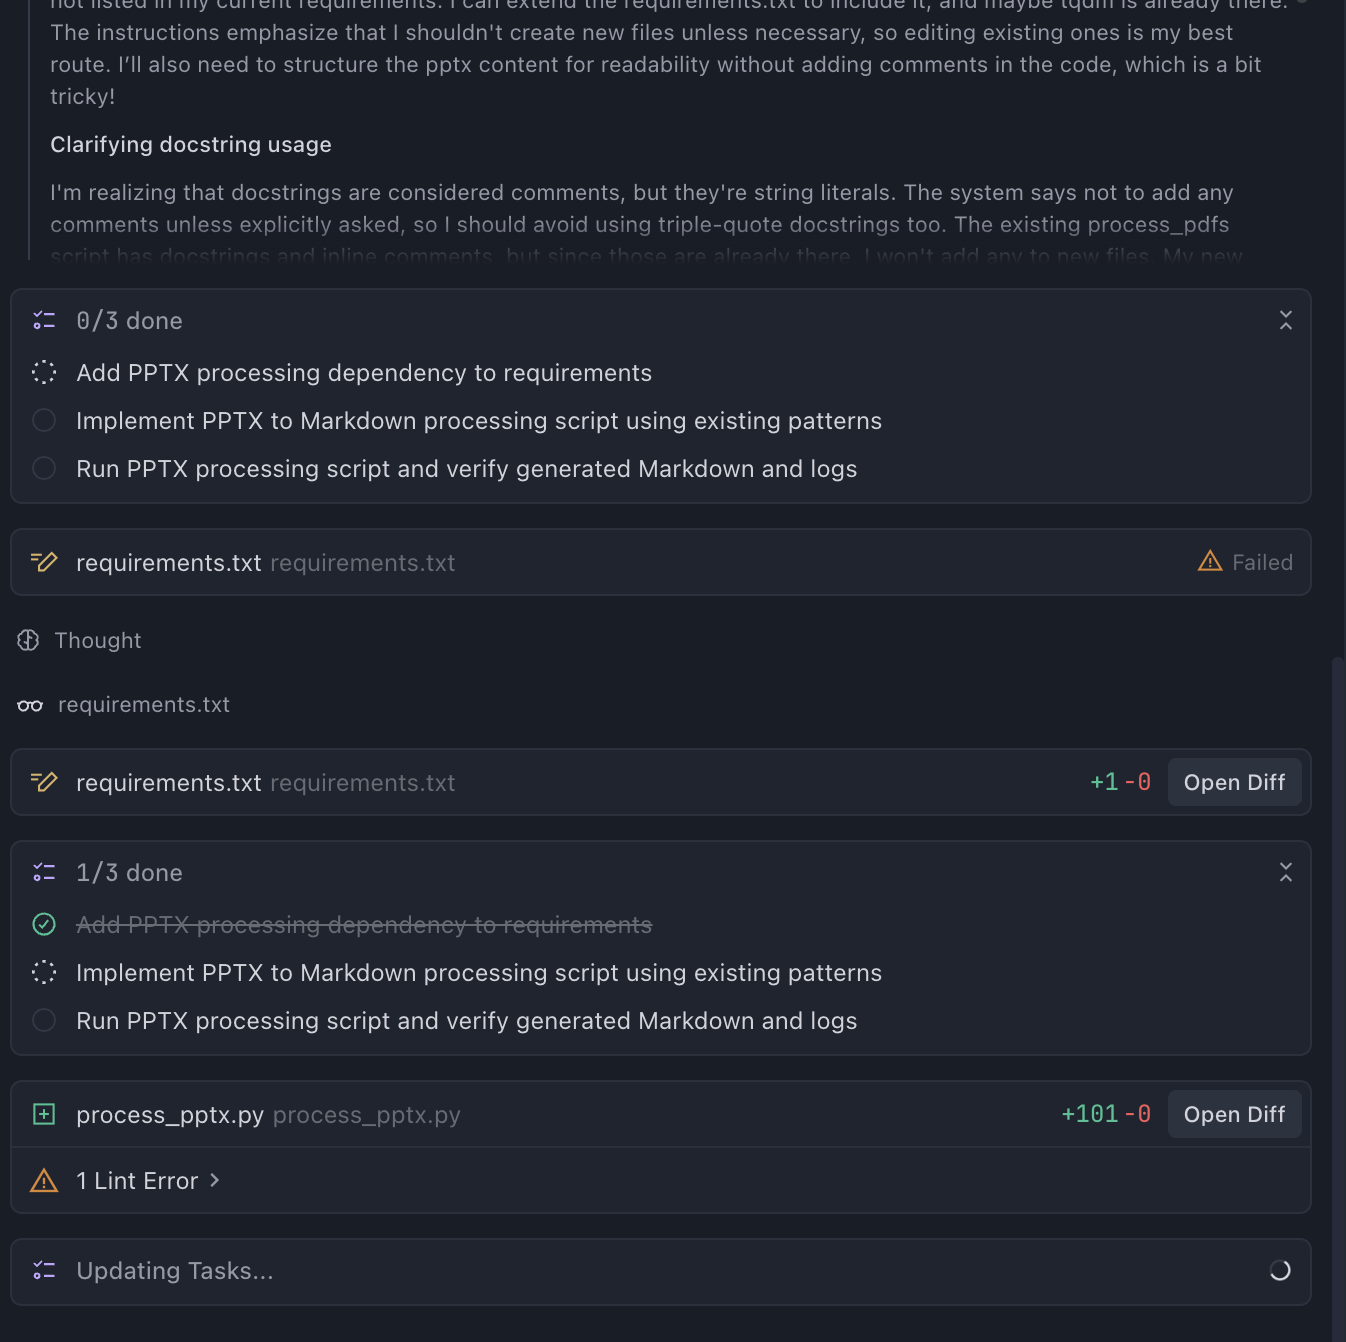
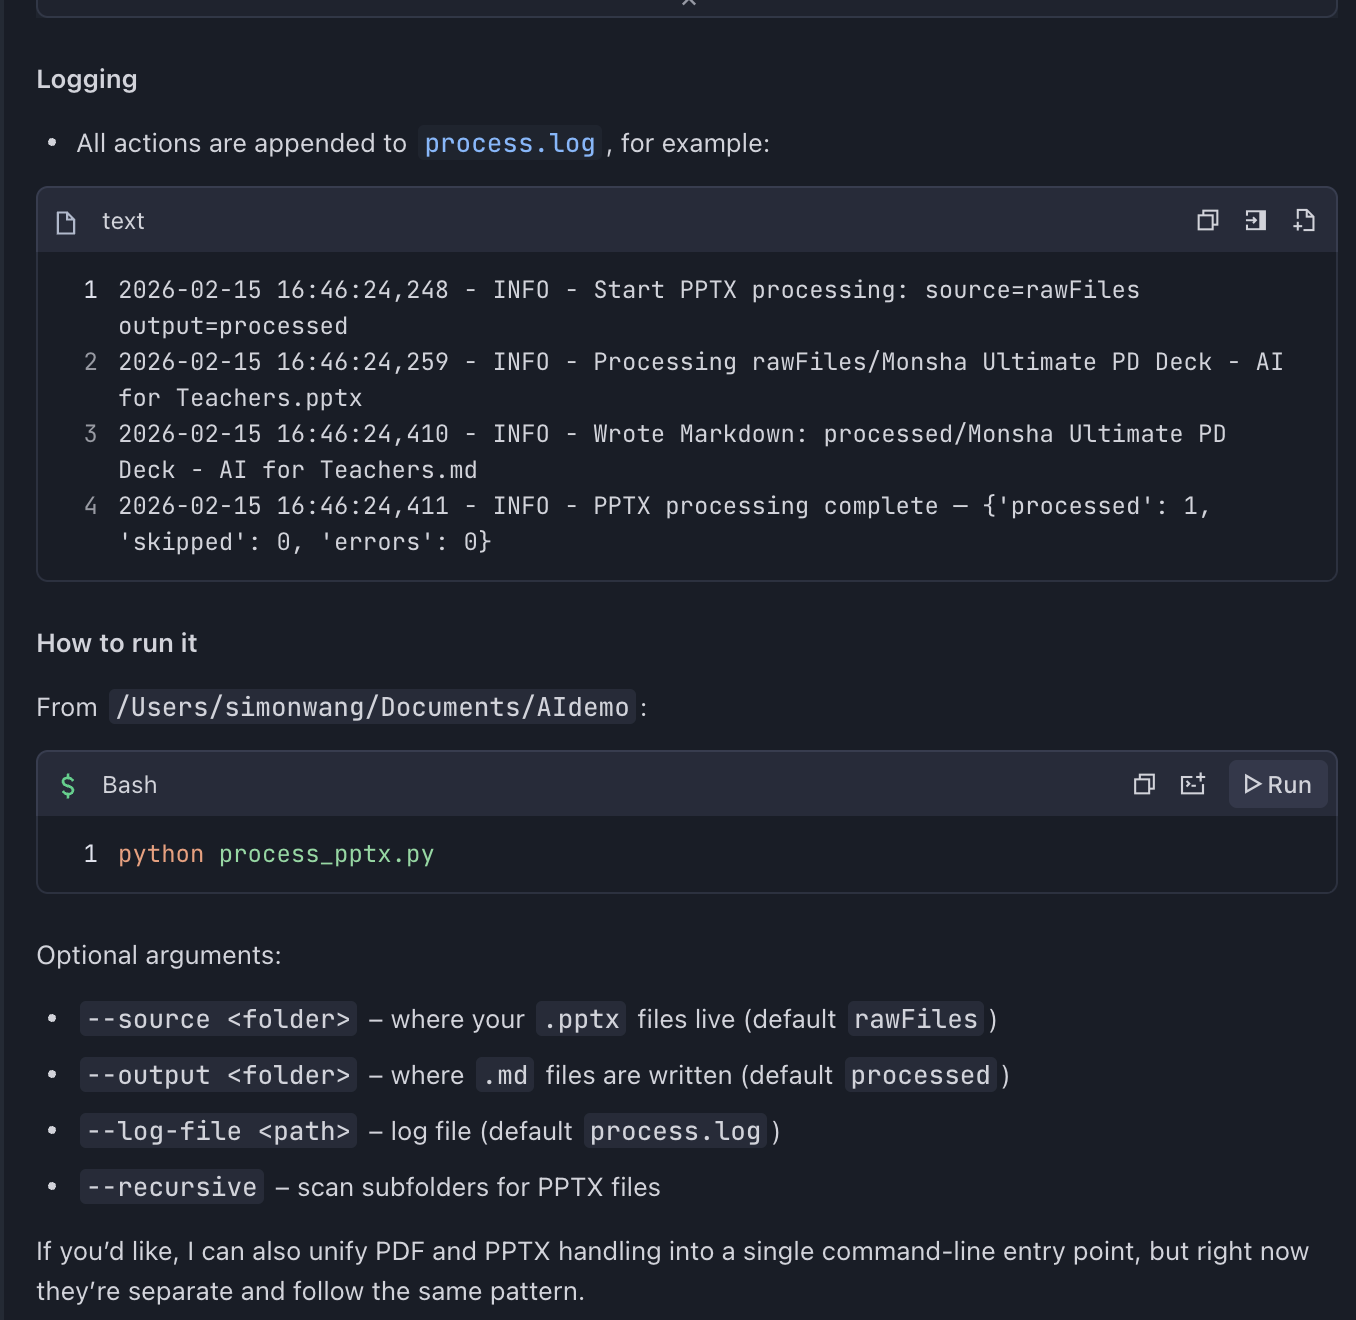
Trae also successfully completed the task!
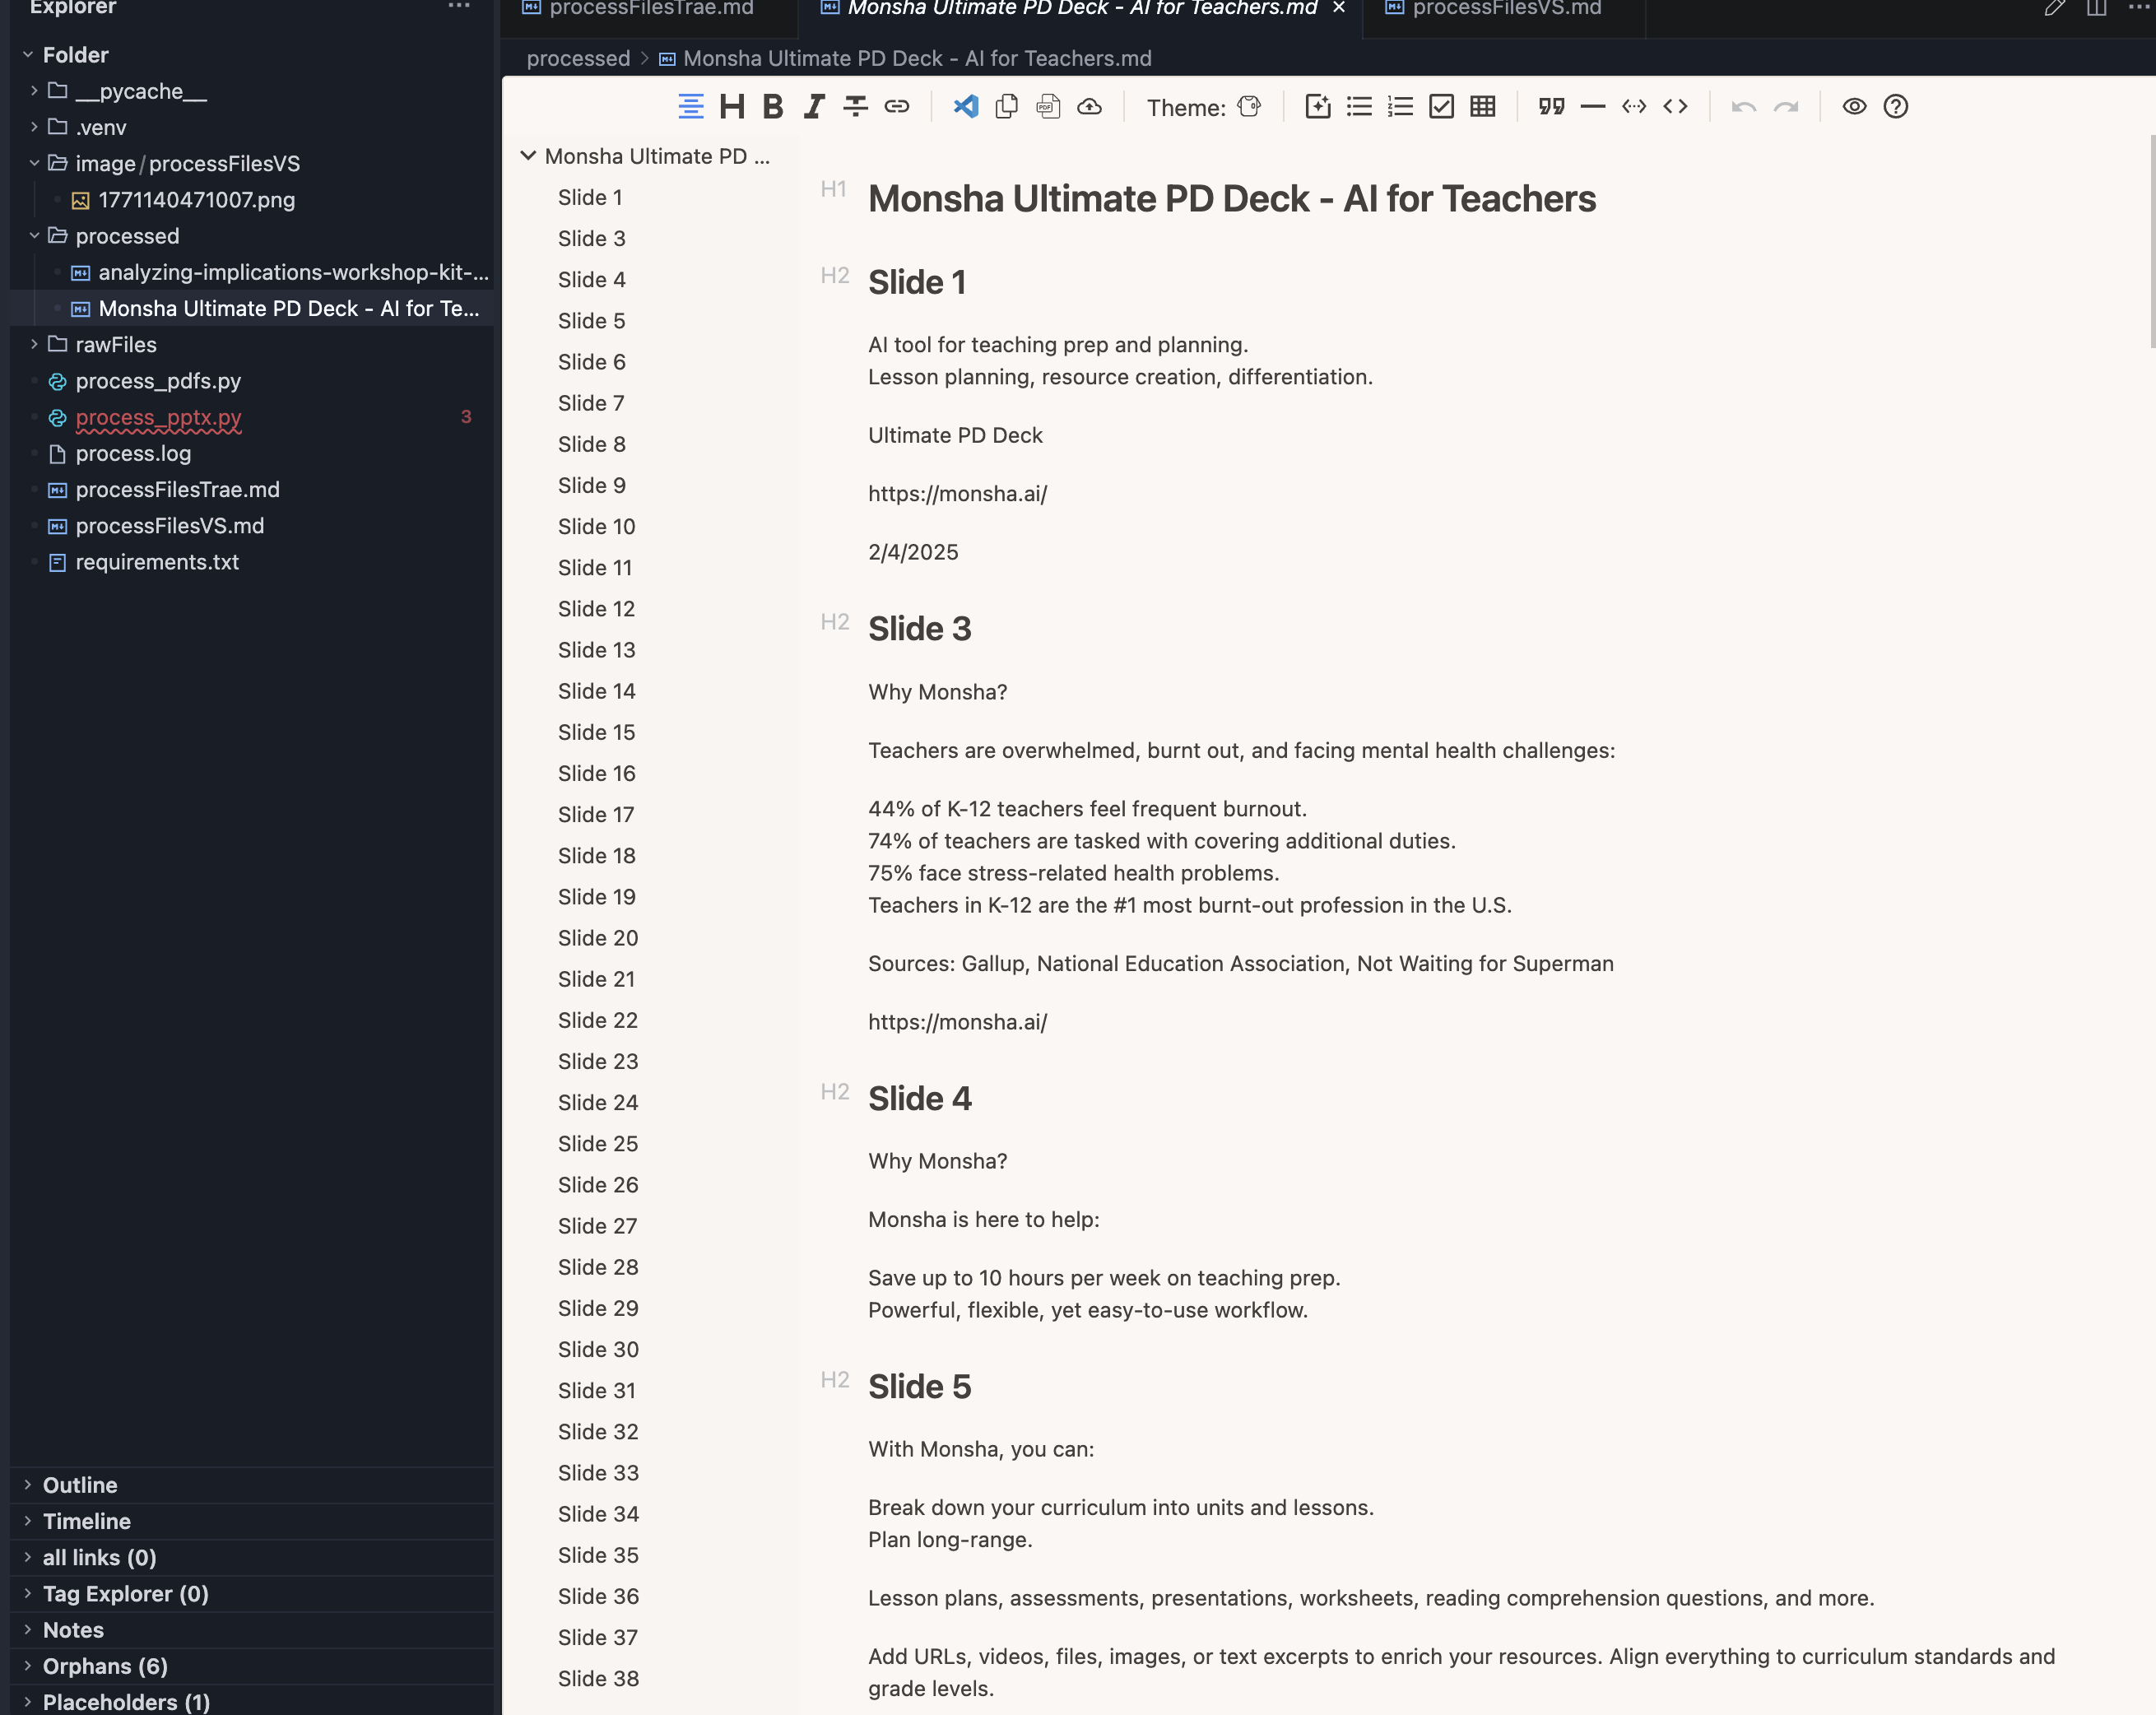
Trae successfully converted the PPTX to Markdown
Summary
The main purpose of this post is to introduce AI agent installation and basic operations. I hope you can successfully complete the steps above — converting PDF and PPTX files to Markdown. If you have any questions, please leave a comment. I'll also be adding more information in the comments section.
Can't attend live? Register anyway — you'll receive the recording and all learning materials.
Register for the WorkshopSponsored by the Trae team. Participants receive complimentary Trae tokens (valid for 3 days).